|
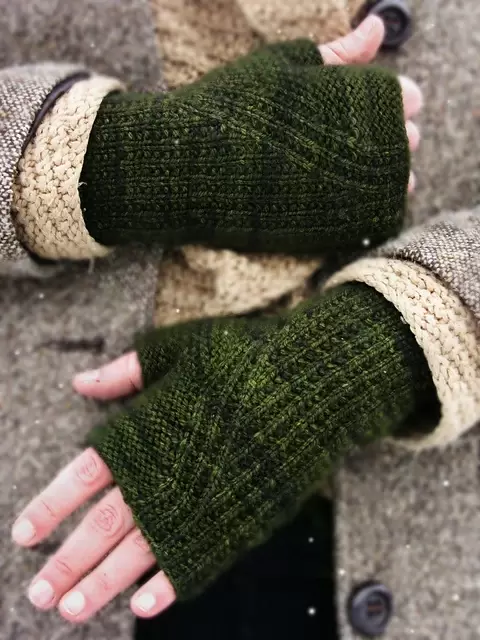
The Indie Design Gift-A-Long is here! If you haven't taken part before, the gift-a-long is basically a giant knit along/crochet along on Ravelry in the run up to the festive season. It begins today with a sale on over 4500 independently designed knitting/crochet patterns from 250 designers. Use coupon code giftalong20 from today until 30th Nov - you can find which patterns are eligible here. It's more than just a sale though, you can post your projects on the forums to be in with a chance to win prizes - as well as getting your fix of knitting chat! That carries on until the end of December. Normally I try to knit quite a few things getting ready for Christmas (last year I made a whole batch of bunbuns as gifts) but this year things are a bit different with a newborn. She's not keen on napping unless I'm cuddling her, so not much knitting is on the cards. However I am going to try to make myself a pair of handwarmers - my hands have been getting chilly pushing the pram! I'm going to try to knit these gorgeous Ridgeview Mitts by Kerriknits Designs. I have some super bright coral yarn that would be perfect! I need to mention though that this is all based on Ravelry and unfortunately they still have not fixed their accessibility issues. For those of you who can't access Ravelry at the moment, not to worry! There's an alternative which starts up tomorrow, I'll be posting more info then!!
0 Comments
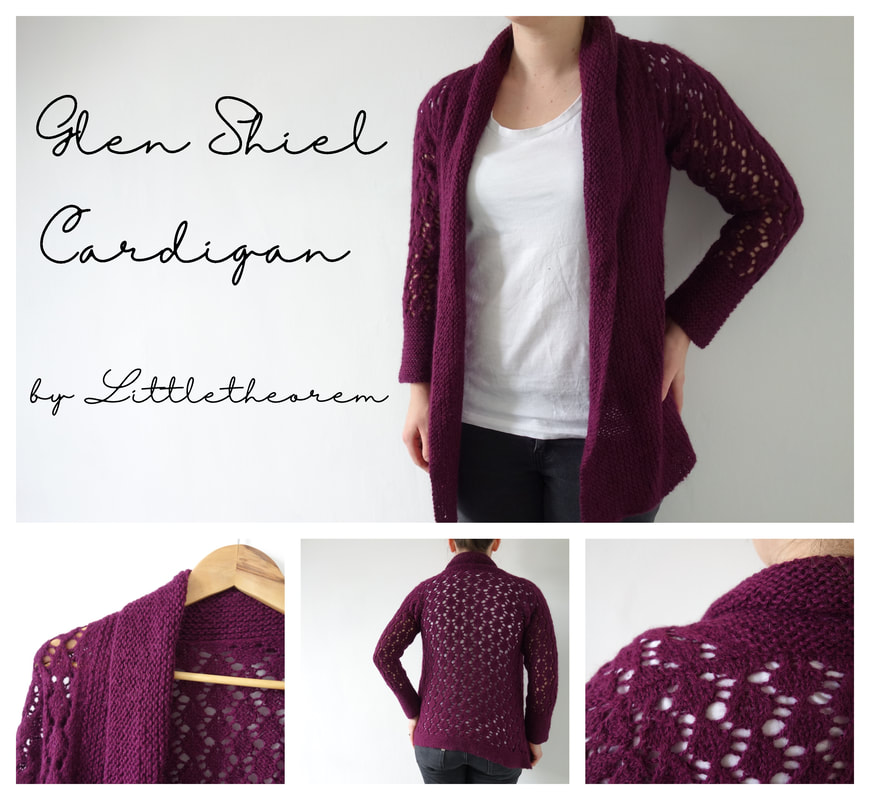
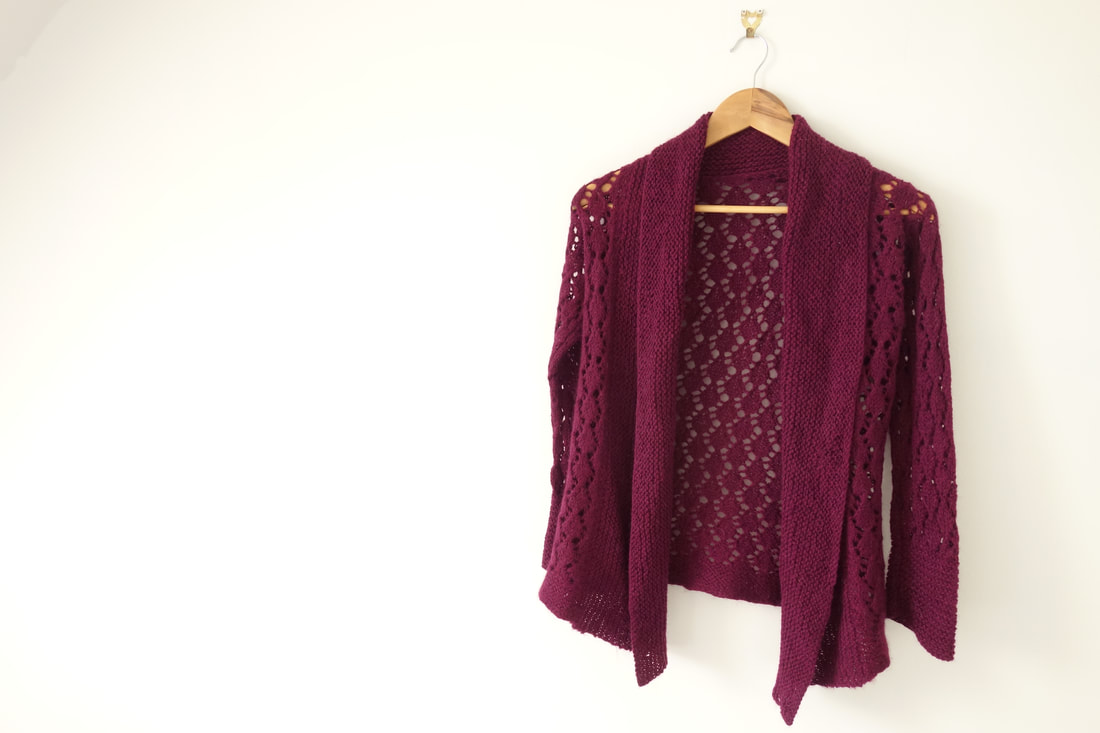
We’ve just released our Glen Shiel Cardigan knitting pattern! It’s classic cardigan with a pretty lace pattern and a cosy shawl front. The lace pattern is simple and straightforward, and it knits up fast with DK yarn and larger needles. This is a perfect winter warmer – one you’ll want to snuggle up in every day! Available in eight sizes to fit bust from 30 – 60”.
This cardigan is worked in one piece from the hem up to the underarms, then stitches are divided and we work the two fronts and the back separately, then we rejoin fronts and back with a three needle bind off at the shoulder. Pick up stitches round the armhole for sleeves which are worked flat and seamed, and to finish off pick up stitches round the front of the cardigan for a shawl collar. Shown in size 85-90 cm/34-36” on a model with 34” bust.
Here's the nitty gritty details:
Yarn: Wool and the Gang Sugar Baby Alpaca (100% Baby Alpaca 116 m/127 yds per 50g) DK weight Colourway: Margaux Red Meterage 850 (950, 1125, 1290, 1500, 1690, 1930, 2150) m Yardage 935 (1045, 1240, 1420, 1650, 1860, 2130, 2365) yds Dimensions (Metric) To fit bust: 75-80 (85-90, 95-100, 105-110, 115-120, 125-130, 135-140, 145-150) cm Across Back: 40 (45, 50, 55, 60, 65, 70, 75) cm Length Armpit to hem:46 (46, 49, 49, 52, 52, 55, 55) cm Upper Arm Circumference: 30 (35, 35, 40, 40, 45, 45, 50) cm Sleeve Length 48 (48, 51, 51, 54, 54, 57, 57) cm Dimensions: (Imperial) To fit bust: 30-32 (34-36, 38-40, 42-44, 46-48, 50-52, 54-56, 58-60)” Across Back: 16 (18, 20, 22, 24, 26, 28, 30)” Length Armpit to hem:18.5 (18.5, 19.75, 19.75, 22, 22, 23.25, 23.25)” Upper Arm Circumference: 12 (14, 14, 16, 16, 18, 18, 20)” Sleeve Length 19 (19, 20, 20, 21.5, 21.5, 23, 23)” Needles: 5 mm/US 8, 100 cm/40” circular needle, set of 5 mm/US 8 DPNs or spare 5 mm/US 8 circular needle Gauge: 16 sts and 26 rows = 4”/10 cm in main lace pattern after blocking. Extras: Tapestry needle for weaving in loose ends, holder or waste yarn for holding live stitches. It’s available on Etsy, Ravelry and here on our website.
We’ve also got a fab test knitting opportunity!
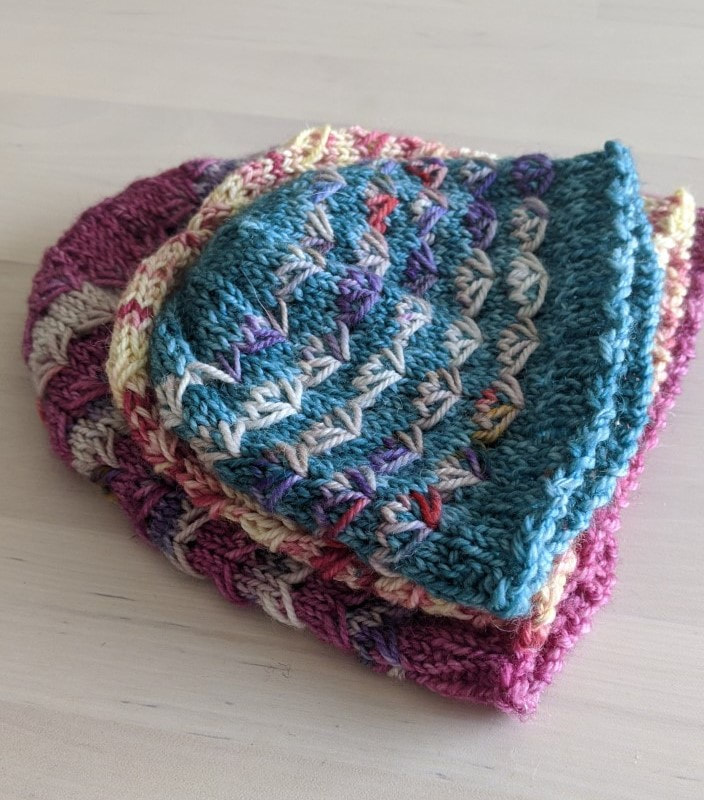
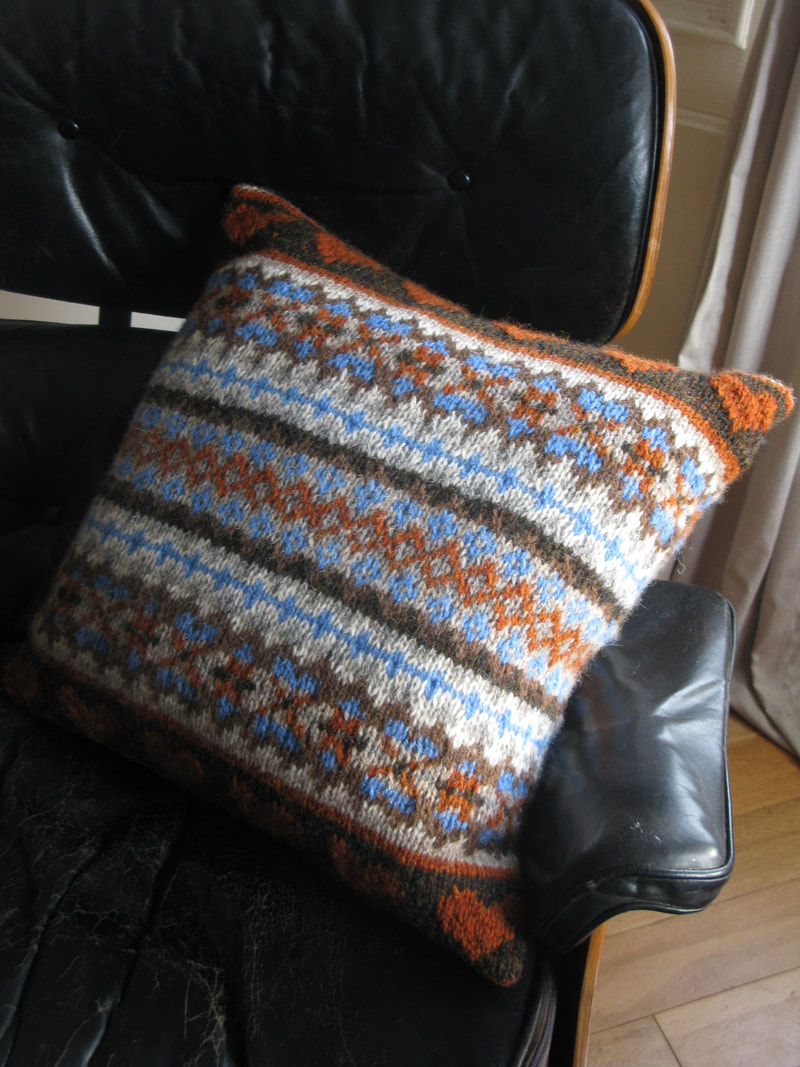
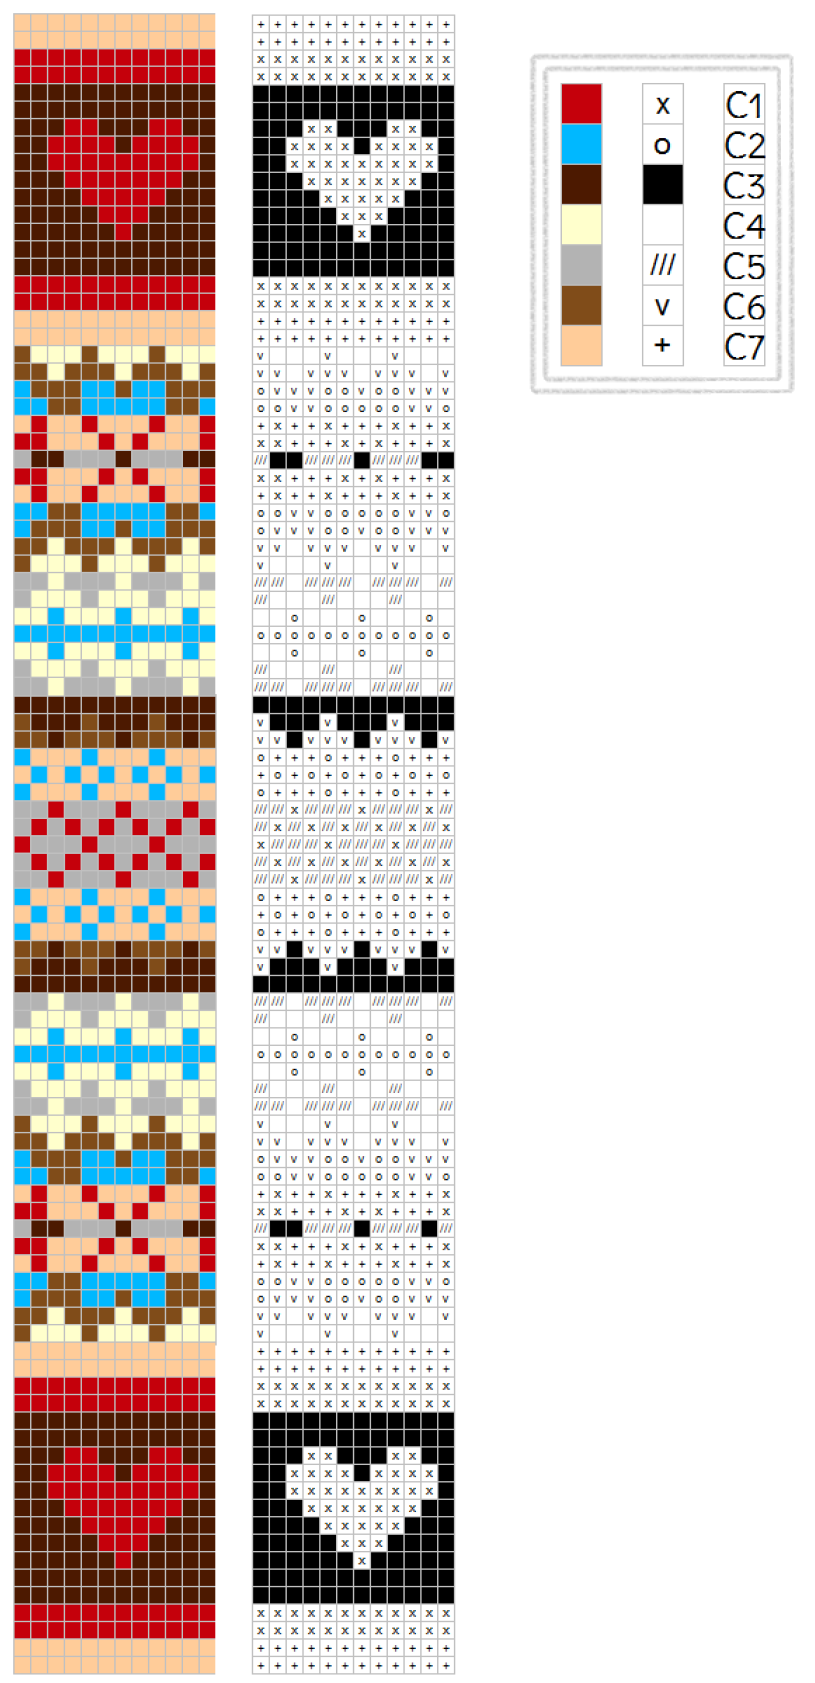
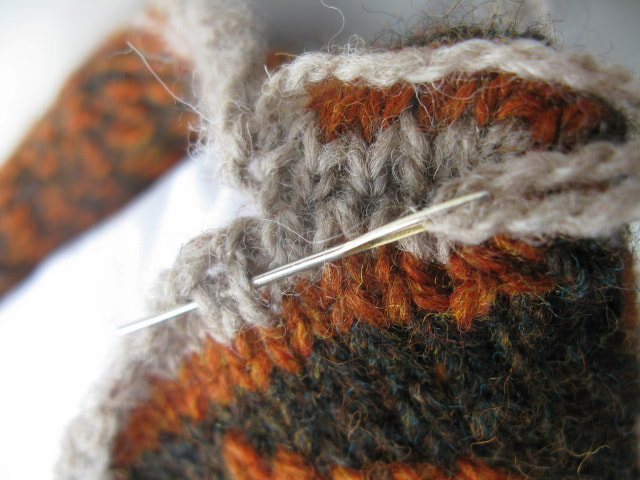
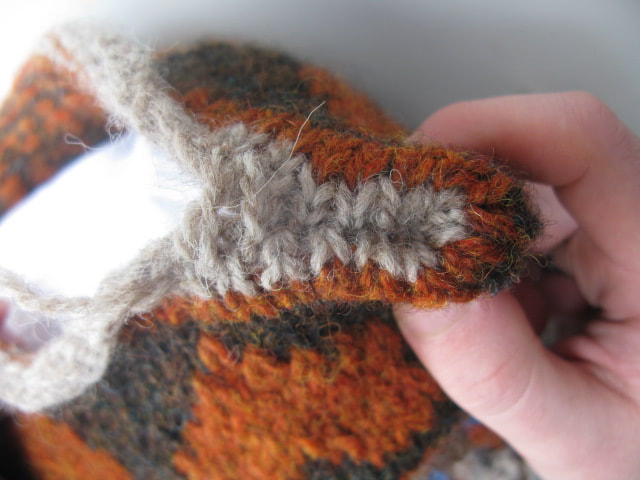
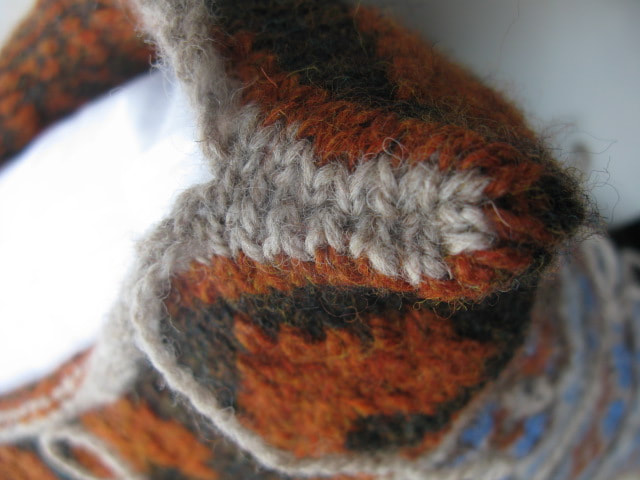
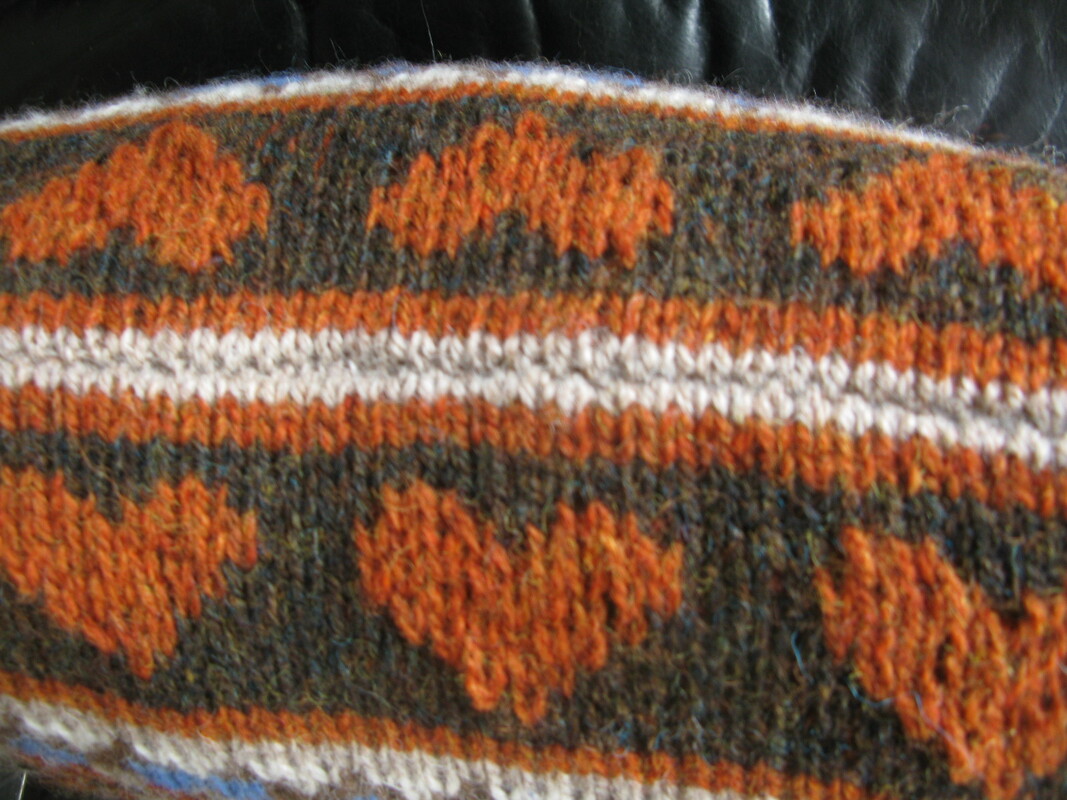
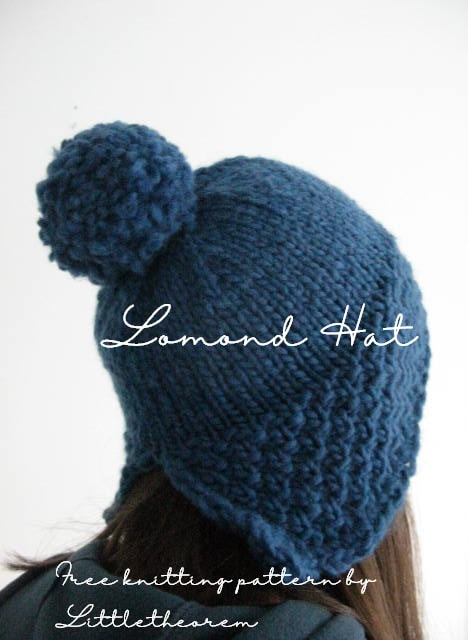
Dip in the Lily Pond is a pretty hat pattern in an unusual stitch pattern. A versatile knit with a wide range of sizes from newborn to adult large, and three colourwork options letting you create beautiful and unique hats for every occasion. Perfect for using mini skeins or leftover odds and ends of sock yarn too! The pattern uses dipped stitches which look just like waterlilies, hence the name of this pattern. To find out more, visit our group on Ravelry. If you’d like to test knit but you’re avoiding Ravelry due to their ongoing issues with accessibility, please get in touch via email. Go to our homepage and click “contact” at the bottom of the screen. For current test knitters, here’s the tutorial video: A quick to knit, stylish cushion that would make a perfect housewarming gift. I cheated a little to avoid a jog in the round, so this is perhaps a pattern that fairisle purists should avoid. I didn't steek and I didn't knot new colours to old as I knitted, but knotted them all up pretty firmly at the end to cinch it all together. I also (and this is a major transgression) didn't weave in the fifty odd loose ends, but just trimmed the knots and left them inside the cushion. Please feel free to back away from this pattern in horror, but I think it all looks perfectly fine, and for time-poor knitters it'll certainly do the job! I should mention that I first knitted this up and published the pattern over a decade ago and the cushion is still going strong! Yarn Shetland Heather Aran by Jamiesons of Shetland: 2 balls Gingersnap = C1 1 ball Teviot = C2 1 ball Broch = C3 1 ball Natural White = C4 1 ball Sholmit = C5 1 ball Moorit = C6 1 ball Mooskit = C7 Each ball = 101yds / 92m Measurements To fit a 50cm x 50cm (20” x 20”) cushion Needles One 5mm / US 8 40”/100cm circular needle. Gauge 15sts x 19 rows = 10cm / 4” Extras: One darning needle Directions With C7, cast on 144 stitches and join in the round, being careful not to twist the stitches. Work one of the charts below. I prefer working from a colour chart, but have included a black and white version suitable for black and white printing. Bind off all stitches using C7. I didn't knot in new colours as you would normally do for fairisle knitting. After binding off I knotted ends together in pairs as follows. Turn the cushion cover inside out and work from bottom to top, pull the first pair of loose ends fairly tight and knot them together using a reef knot, then do the same for the second pair you come to, and keep going until all loose ends are knotted together in pairs. Then I just trimmed the loose ends (and felt guilty). Now, lay the cushion cover out flat with the beginning of the round at the right edge. Join the front and back of the bound off edge together using the joining method in the “techniques” section below. Block the cushion cover as follows, or using your favourite blocking method. Soak the cushion in cold water with a small amount of mild detergent for at least 30 minutes. Rinse thoroughly, then gently squeeze out as much water as you can. Roll the cushion cover up in a towel and twist it gently to remove some more water. Lay the cushion cover out flat and gently stretch it to 50cm x 50cm (20” x 20”). Leave until completely dry. Put the cushion pad into the cushion cover and join together the cast on edges, starting from the beginning of the round, in the same way you joined the bound off edge. Charts Techniques Joining bound off and cast on edges This cushion is knit in the round, sewn up along the top, blocked, a cushion pad inserted, and then sewn up along the bottom. I sewed the top and bottom up as follows: Lay cushion cover flat, with beginning of round at the right. We will join the first stitch at the front right with the first stitch at the back, then the second stitch at the front with the second stitch at the back etc. until all front stitches are joined to the back stitches. To do this, thread a darning needle with a long thread in colour C7. Secure the thread to the wrong side of the cushion at the beginning of the round by sewing over one spot a few times. Then bring the needle behind the first stitch at the front from right to left, then behind the first stitch at the back from right to left (as you look at it). Pull the thread tight. Then bring the needle behind the second stitch at the front from right to left, then the second back stitch from right to left, pull the thread tight. Keep going across from right to left until all stitches are joined. Written instructions are not ideal, so please watch the video tutorial here: http://newstitchaday.com/how-to-knit-seaming-two-bind-off-edges-together/ They join two pieces of knitting together, whereas we just have the one which we are joining the front and back of, but the principle holds! Pattern copyright Littletheorem. Do not reproduce in whole or in part without the author's written permission. Steall Shawl
We're looking for test knitters for two new patterns!
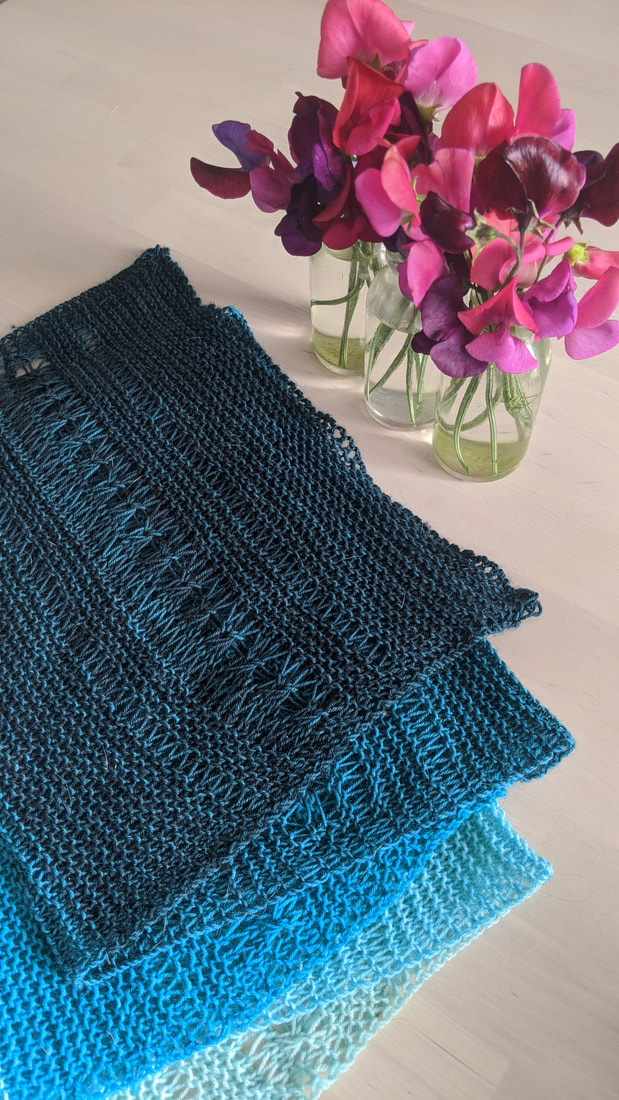
The first is our Steall Shawl. A gorgeous shawl with a beautifully simple lace design that’s so much fun to knit. We love how quick this is to knit in mainly garter stitch, with a stunning lace section that’s much easier than it looks! This scarf makes the most of a spectrum of mini skeins from River Knits yarns, but it would be a perfect way to use up odds and ends of 4 ply yarn too! The pattern is similar to our Bracklinn Crop so I named it after another Scottish waterfall. The Steall Waterfall is found in Glen Nevis, a stunning beauty spot near Scotland’s highest mountain. The colours match with a waterfall theme too! Please note that we value inclusivity at Littletheorem Knits. We welcome all test knitters regardless of age, race, gender, religion, sexual orientation or yarn budget – knitting is for everyone! If you’re interested, head over to our Ravelry Group to find out more! If you can't access Ravelry at the moment due to its new format, drop us an email by clicking the mail icon at the bottom of our homepage. For current test knitters, here's a video showing how to work that one tricky stitch! Kingsbarns Baby Blanket
Our second pattern up for testing is our Kingsbarns Baby Blanket.
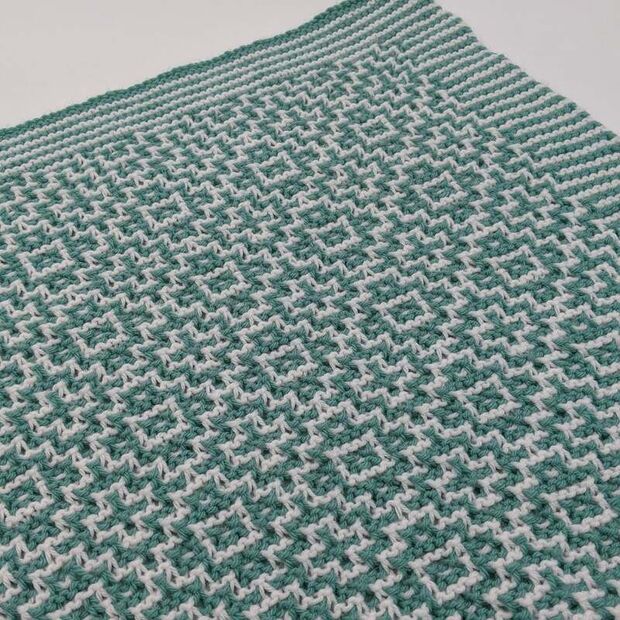
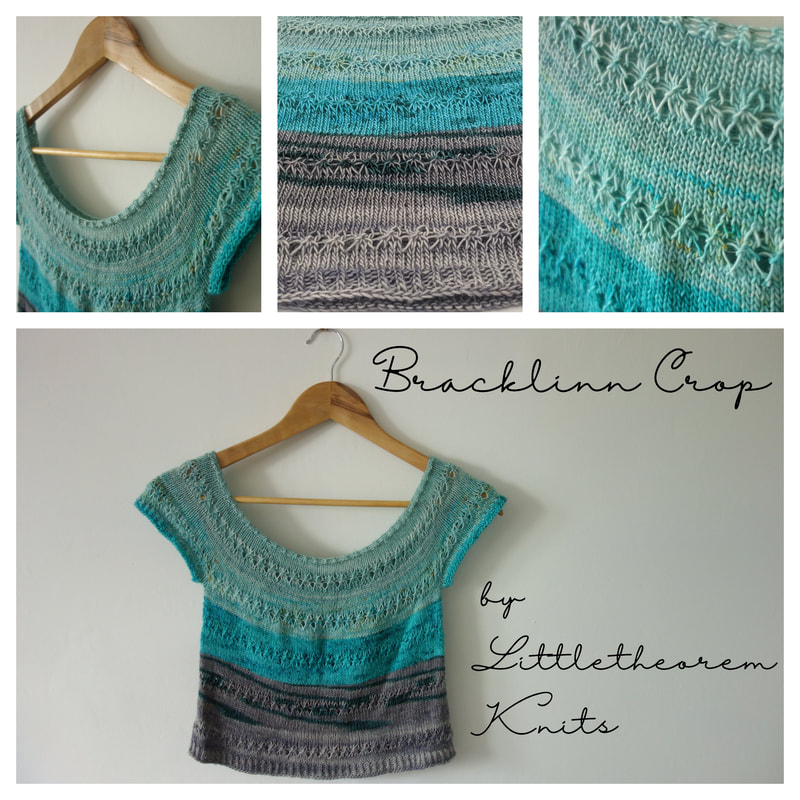
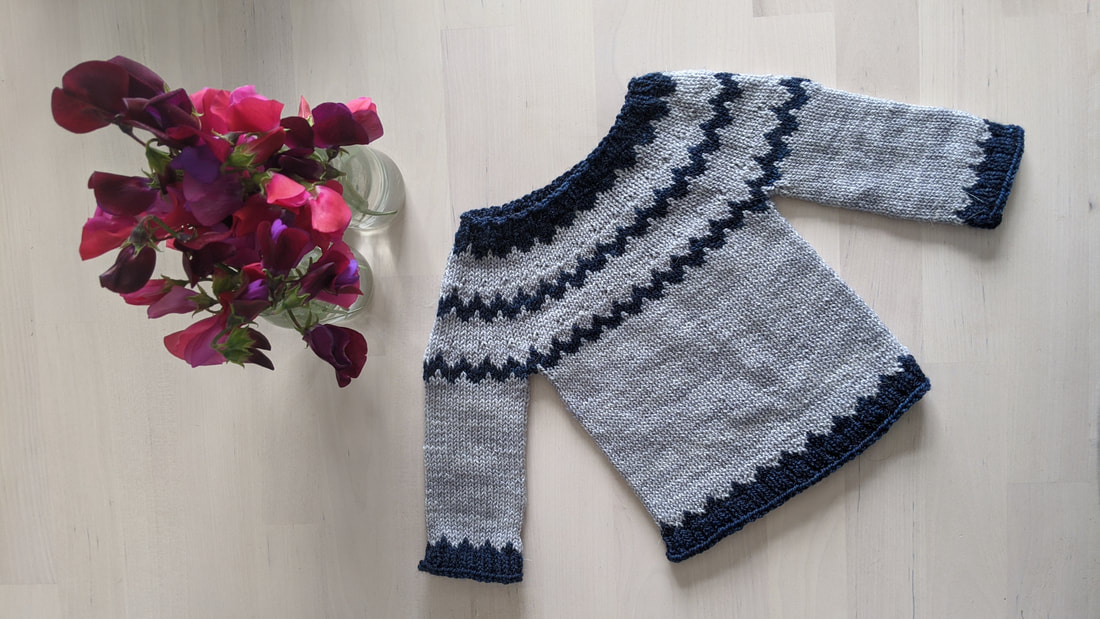
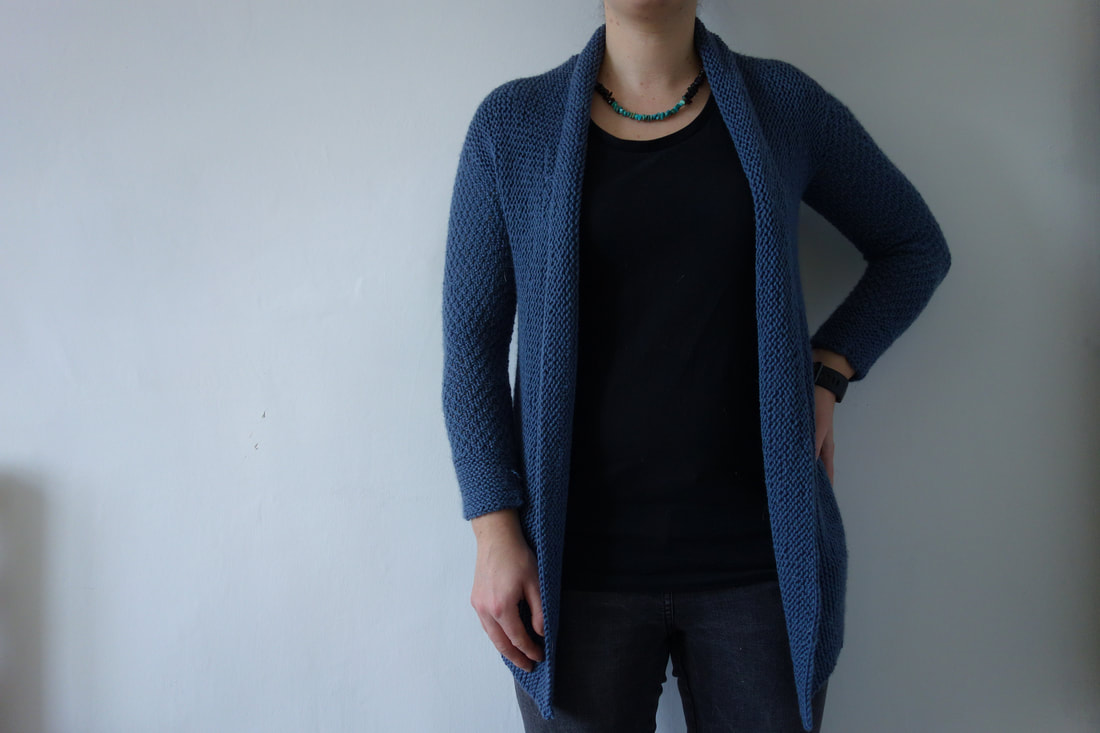
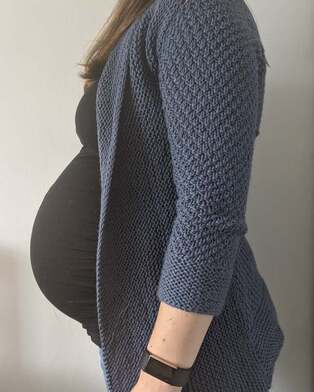
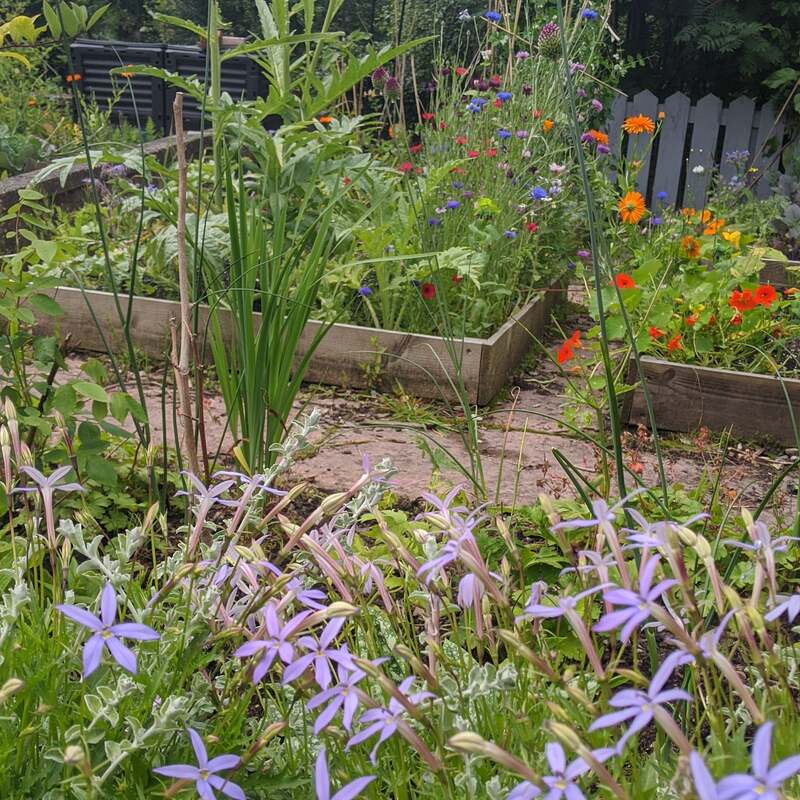
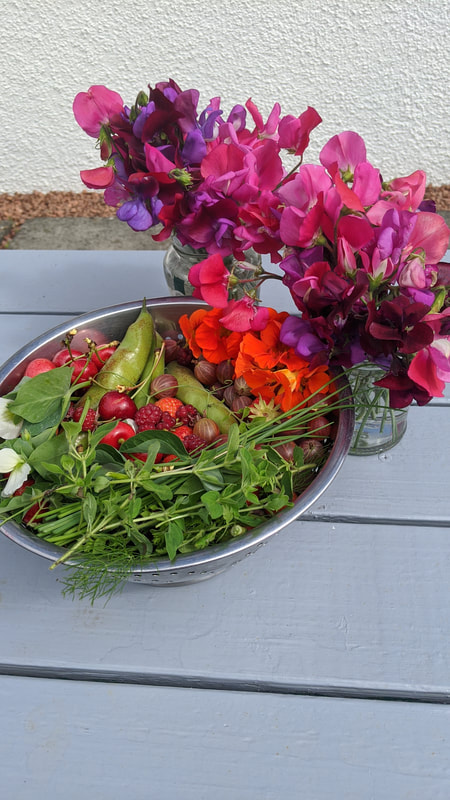
A simple but addictive mosaic pattern that makes a beautiful heirloom baby blanket. If you’ve never made a mosaic knitting pattern before, you’ll soon find out how straightforward and satisfying it is. Kingsbarns is a little coastal town near where I grew up. I spent hours as a child playing in the rockpools there. The blue green and white pattern reminds me of waves breaking on the rocky shore. But maybe I’m just getting nostalgic with a baby of my own on the way! Again, if you’re interested, head over to our Ravelry Group to find out more! It's available to test in three different sizes. If you can't access Ravelry at the moment due to its new format, drop us an email by clicking the mail icon at the bottom of our homepage. We've just released our latest pattern - Bracklinn Crop! It's a super cute cropped tee worked from the top down with an "easier than it looks" lace pattern. Designed for mini-skein sets or leftover sock yarn - with detailed instructions on using more/fewer colours. It's available in nine sizes too, to fit busts from 28" - 62", and it's been thoroughly tech edited and test knitted. It's available here on our website and also on Etsy and Ravelry - use coupon code BRACKLINN50 for a 50% discount until midnight (GMT) on Wednesday 5th Aug. We've got a few new test knits on the go at the moment too! One's sweet and simple children’s sweater with zigzag colourwork detailing. Worked from the top down using a yoked construction, this straightforward knit is totally seamless. Available in 9 sizes to fit newborns to 11 year olds: The next is a worsted weight version of our classic winter warmer, Courie In. It's got a slightly unusual construction. Sleeves are knitted first from cuff to centre back, then both sleeves are joined with a three needle bind off. Stitches are picked up at the bottom edge from underarm to underarm and worked down to the hem to form the back. Then stitches are picked up round the front to form the garter stitch wrap front. There's instructions for nine sizes to fit busts from 26” to 60”/65 to 150 cm, and I'm looking for two testers per size ideally. Apart from all this knitting I've been trying to chill out and enjoy month seven of pregnancy! Not always easy when your back's aching and you can't sleep due to a baby practicing for future dance-offs in the womb! Here's a bump pic, again modelling my new design Worsted Courie In! The weather here in Glasgow's been pretty poor, even by Scottish standards! But still managed a bit of time out in the garden, there's quite a lot of veg still growing and the sweet peas are thriving!
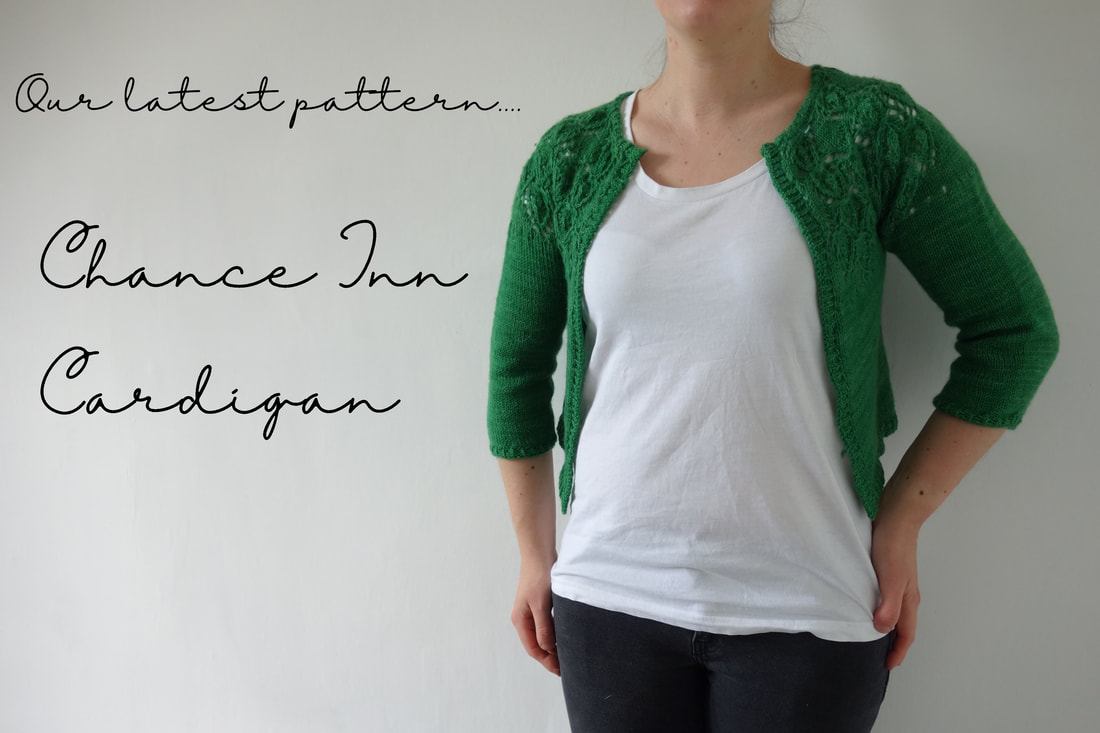
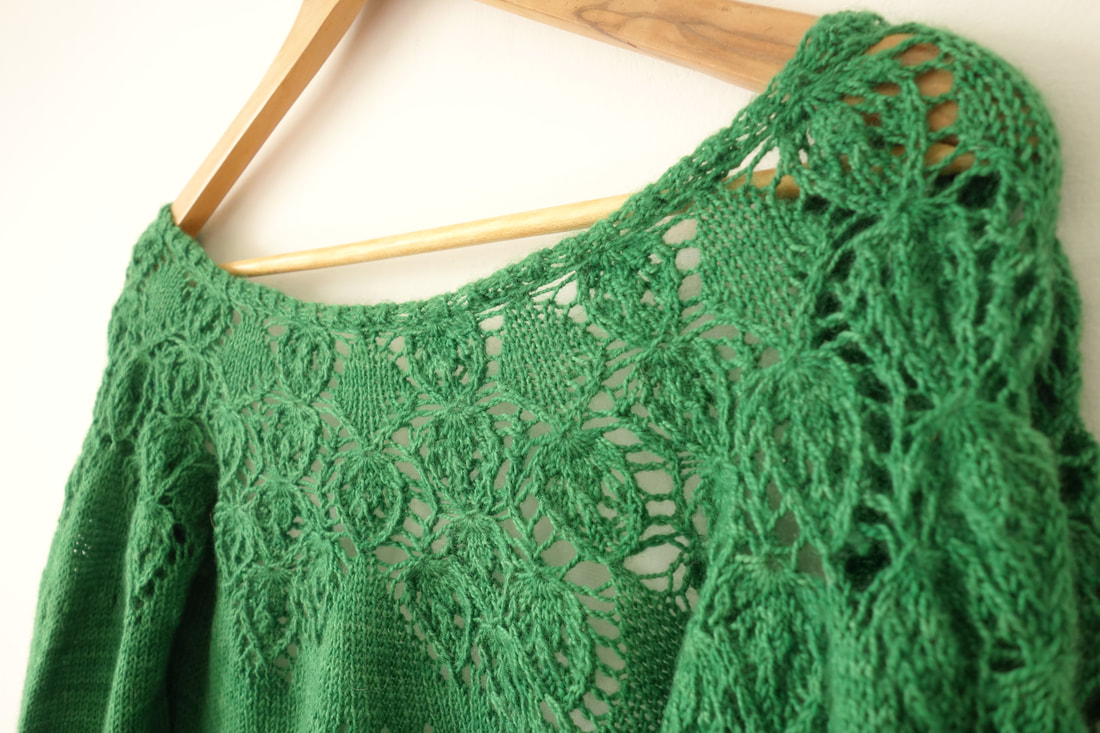
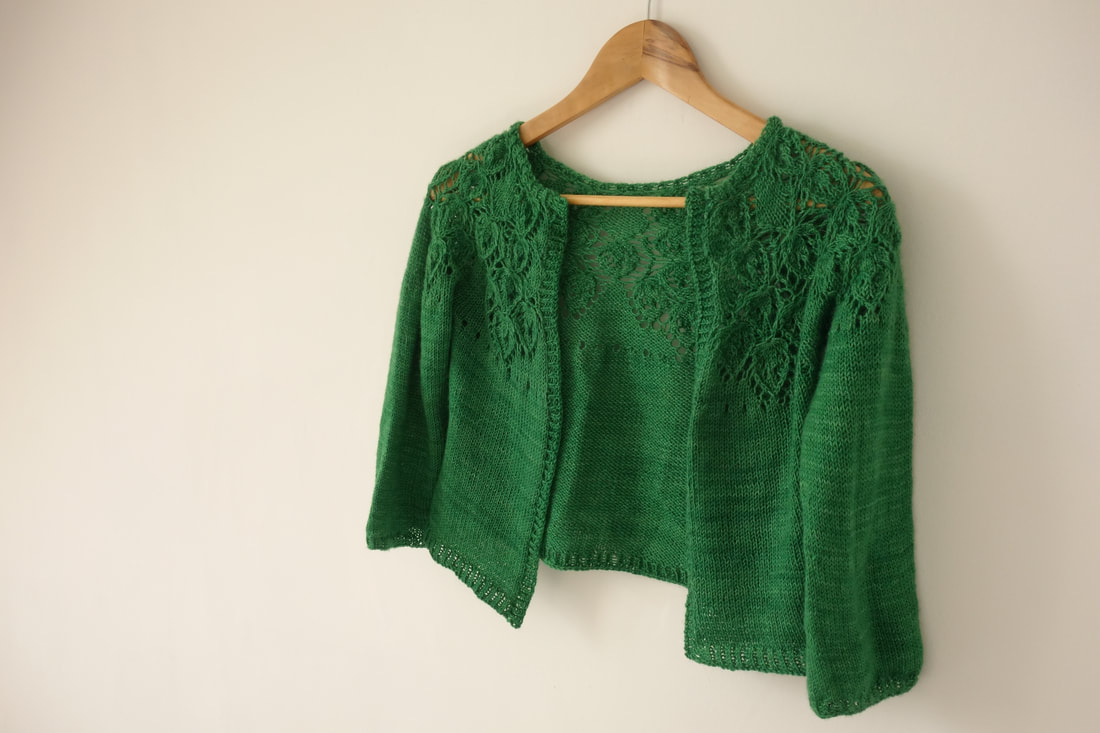
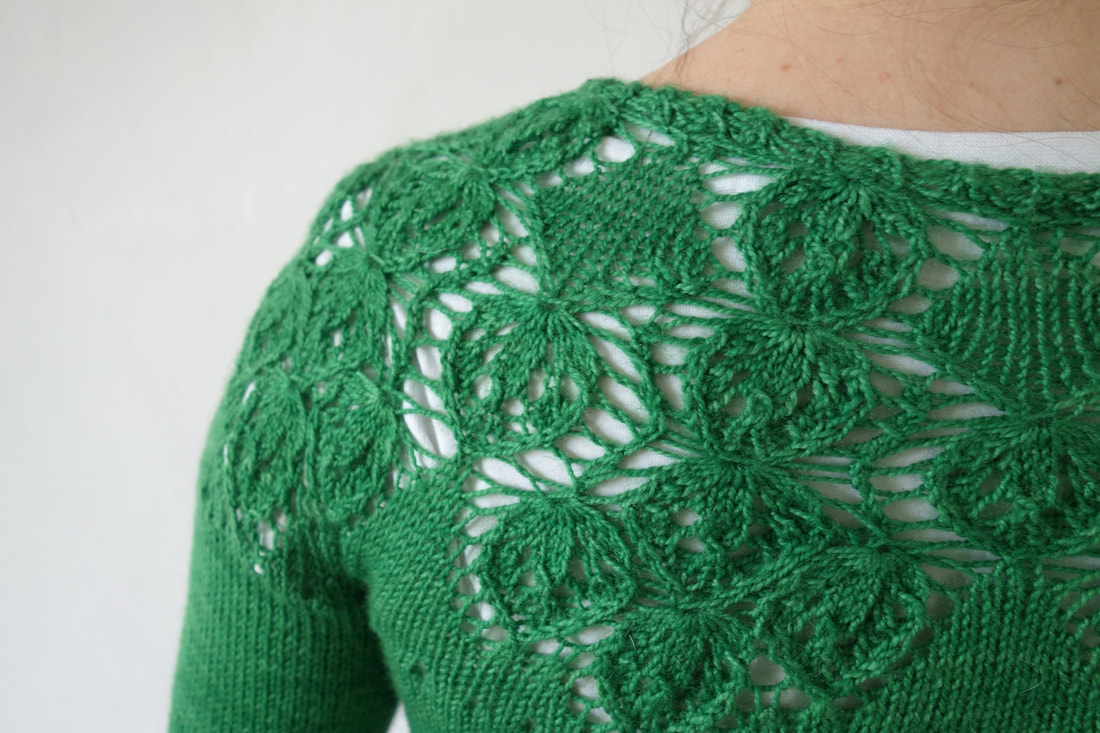
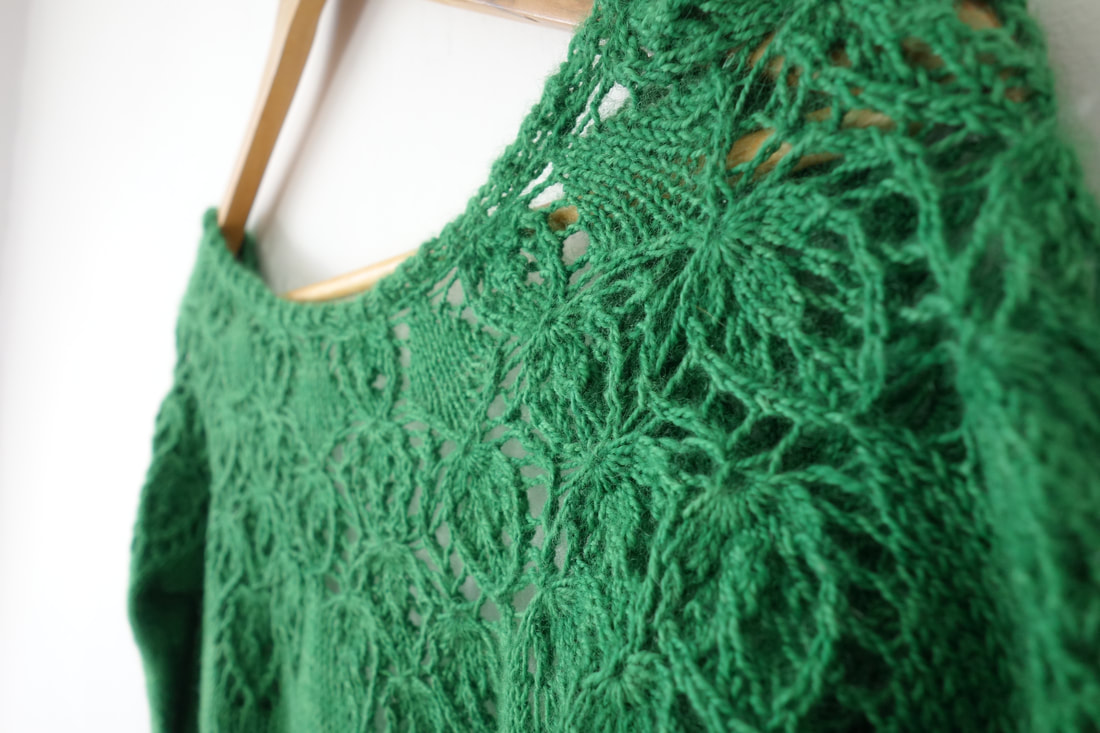
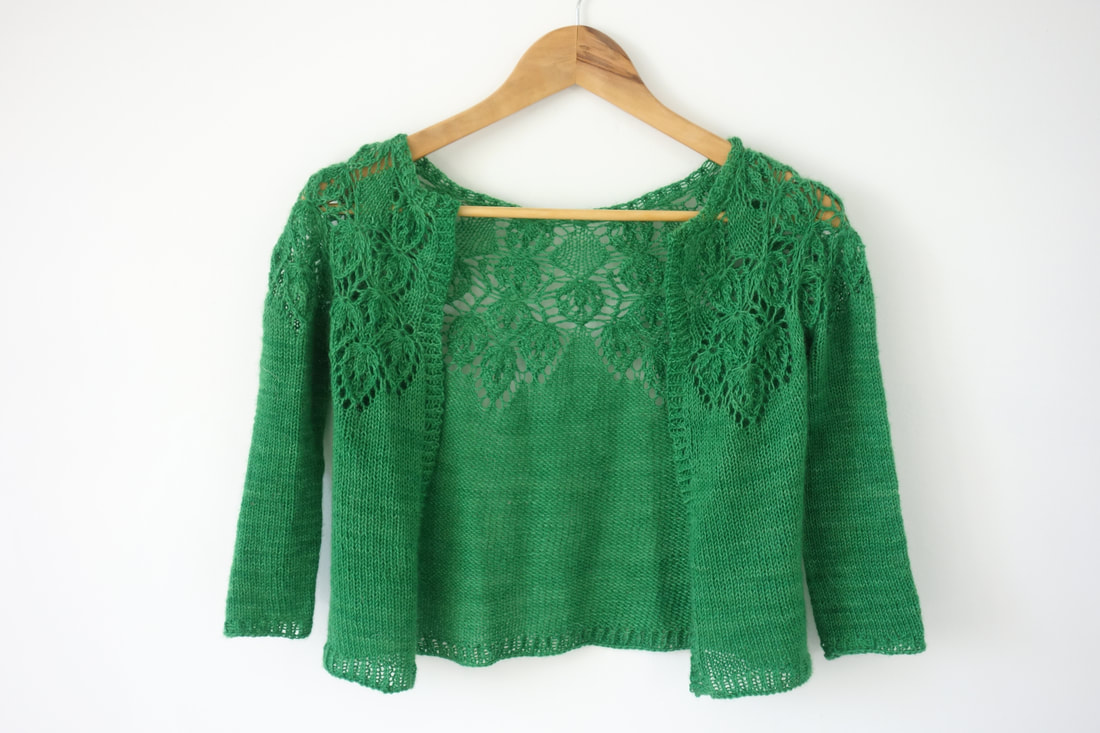
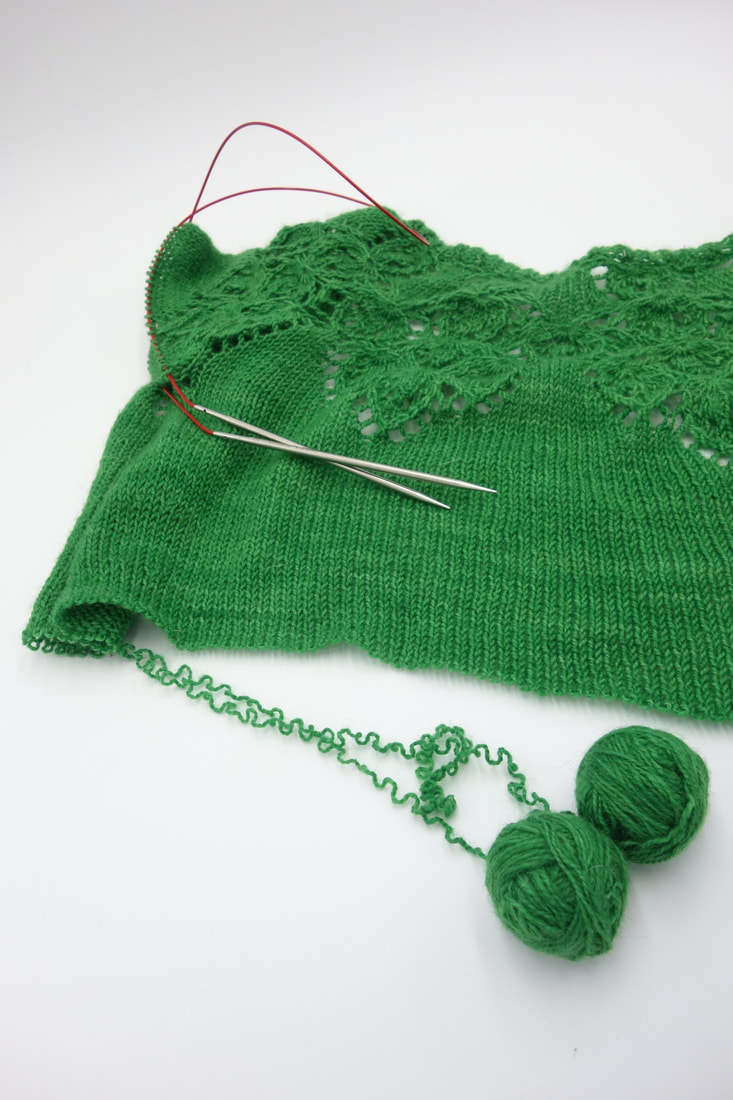
Our latest knitting pattern is now available to download! Chance Inn Cardigan is a lightweight Summer cardigan with a stunning lace yoke. Inspired by a traditional Estonian floral lace pattern, this cardigan is a real showstopper, perfect for a special occasion. This cardigan is worked from the top down with a yoked construction. We work the lace yoke, then divide stitches for body and sleeves, leaving stitches for the sleeves on waste yarn. We work the body down from armpit to hem with waist shaping, and finish with a few rows of twisted ribbing. We pick up stitches at the fronts for a neat edging, also in twisted rib. Then we work sleeves from armpit down to cuff. There's no seaming - it's all worked in one piece. The pattern contains both charts and written instructions for the lace section, as well as instructions for all the lace stitches required. This pattern is written for eight sizes, to fit busts from 30 - 60"/75 - 150 cm. We recommend the gorgeous but hardwearing hand dyed "Tough Sock" yarn from the Uncommon Thread, shown in colourway "Habitat", but any sock yarn that gets gauge will be just fine! It's available to download from our website here. Here's the nitty gritty:
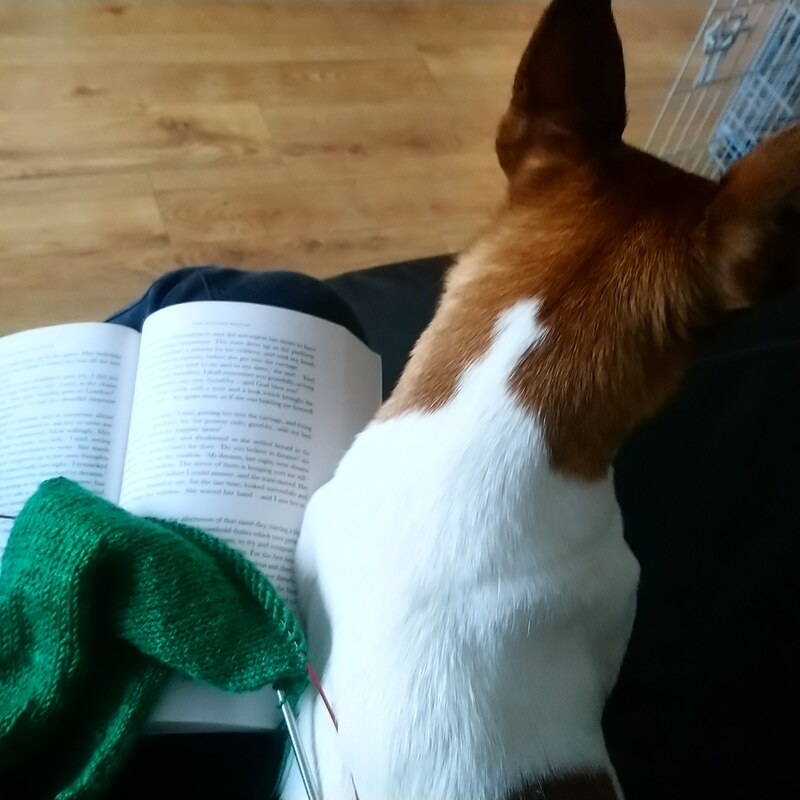
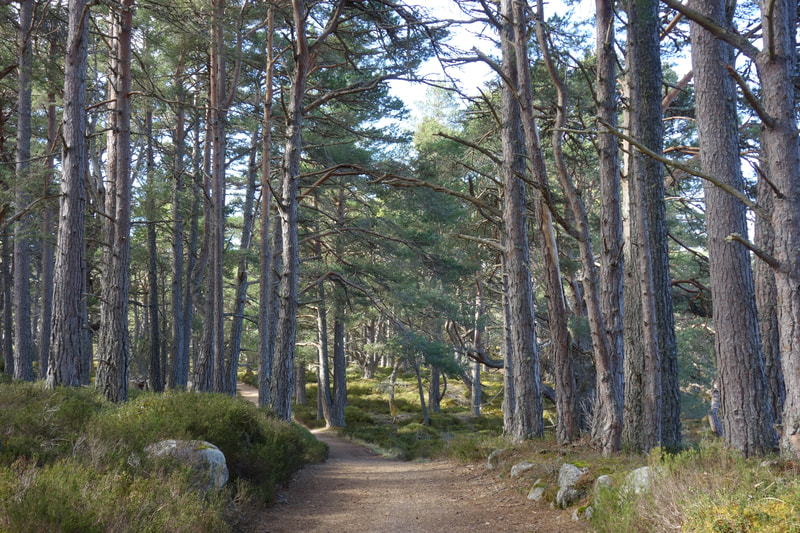
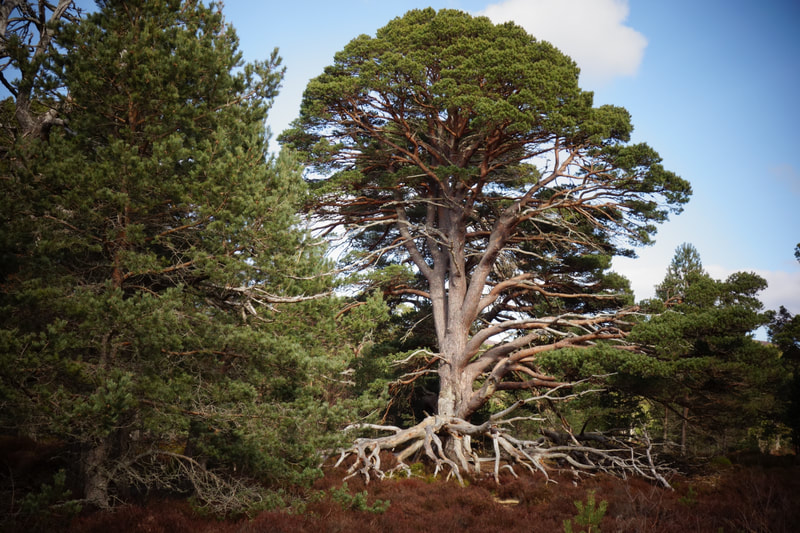
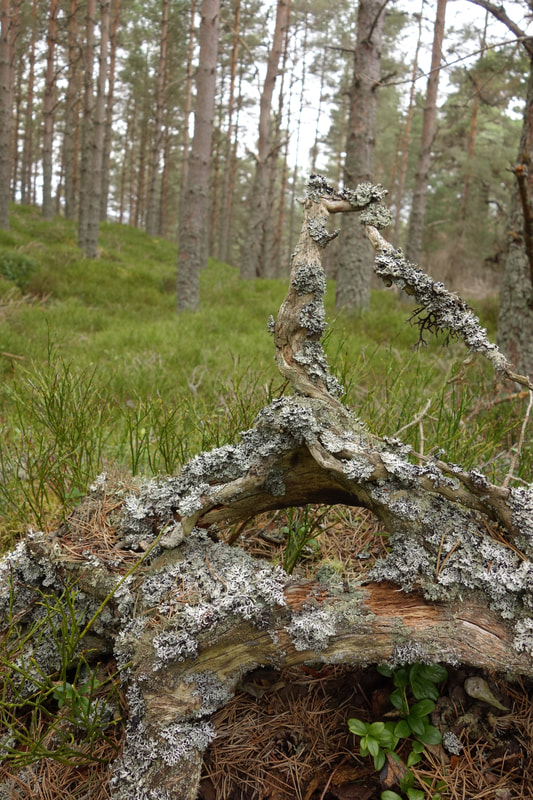
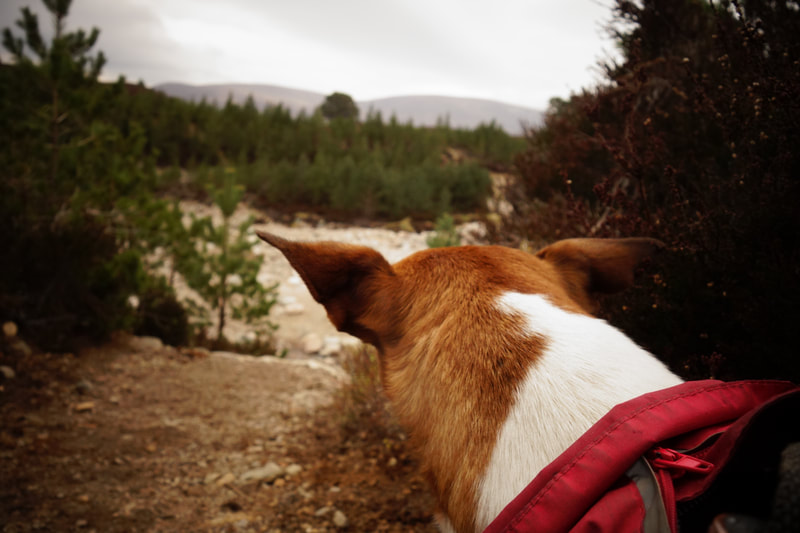
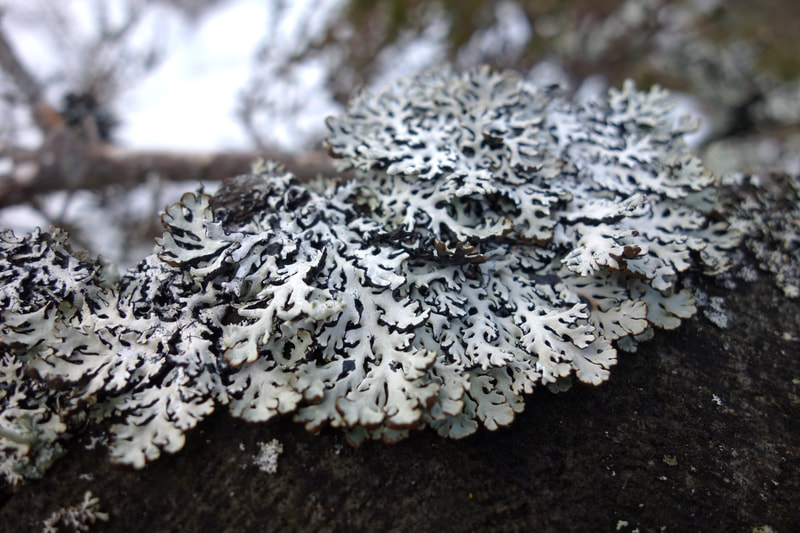
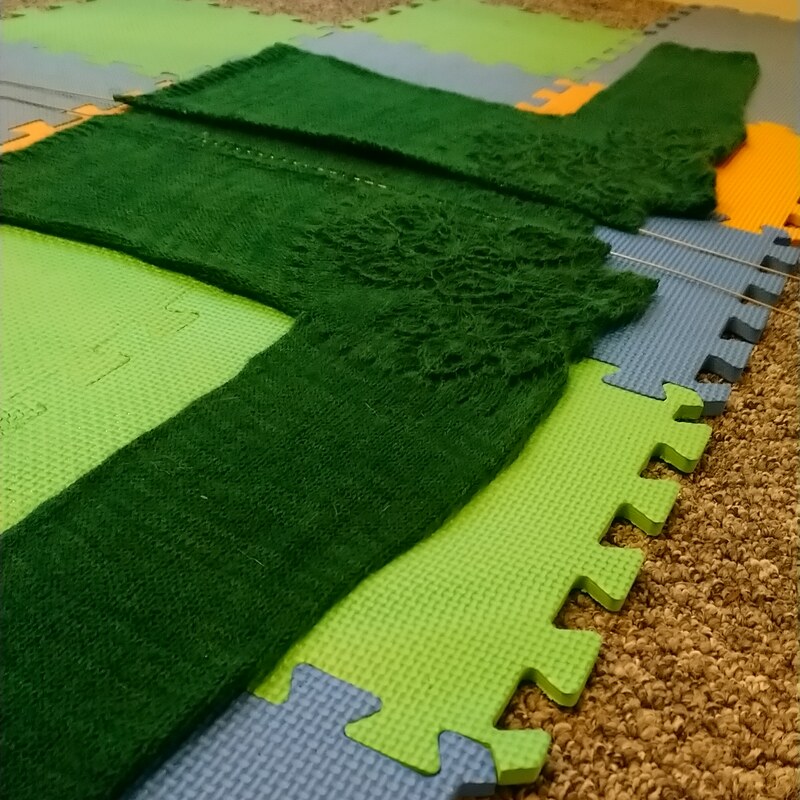
Yarn: The Uncommon Thread Tough Sock Colourway Habitat (80% Superwash Bluefaced Leicester Wool, 20% Nylon) 366 m/400 yds per 100 g 600 (700, 900, 1100, 1300, 1500, 1700, 1900) yds 550 (650, 850, 1000, 1200, 1400, 1600 1800) m Dimensions (Imperial): To fit bust 30-32 (34-36, 38-40, 42-44, 46-48, 50-52, 54-56, 58-60)” Across back armpit to armpit: 16 (18, 20, 22, 24, 26, 28, 30)” Upper sleeve circumference: 12 (13, 14, 15, 16, 17, 18, 19)” Yoke depth: 6.5 (6.5, 7.5, 7.5, 8.5, 8.5, 9.5, 9.5)” Sleeve Length: 13 (13, 14, 14, 15, 15, 15, 15)” Length Armpit to Hem: 9.5 (10.5, 11, 12, 13, 14, 15, 15)” Dimensions (Metric): To fit bust 75-80 (85-90, 95-100, 105-110, 115-120, 125-130, 135-140, 145-150) cm Across back armpit to armpit: 40 (45, 50, 55, 60, 65, 70, 75) cm Upper sleeve circumference: 30 (32.5, 35, 37.5, 40, 42.5, 45, 47.5) cm Yoke depth: 16 (16, 18.5, 18.5, 21, 21, 23.5, 23.5) cm Sleeve Length: 32.5 (32.5, 35, 35, 37.5, 37.5, 37.5, 37.5) cm Length Armpit to Hem: 22.5 (25, 27.5, 30, 32.5, 35, 37.5, 37.5) cm Needles: 4 mm/US 6 75 cm/30” circular needle Gauge: 21 sts and 30 rows = 4” in stocking stitch after blocking Extras: Tapestry needle, waste yarn in a contrasting colour We’re just back from a lovely week away in the Cairngorms. The holiday itself was great, but in knitting terms there’s been a few ups and downs! One of my very best friends has asked me to knit her a cardigan for her wedding. She liked my, Epsilon Cardigan Knitting Pattern so I’ve used the same kind of construction but amped up the lace a bit. I made a huge swatch to test that the lace worked out, but didn’t include much stockinette. How I have paid for that mistake! The gauge in my calculations was off by half a stitch in the “worked flat” sections, and by considerably more when worked in the round. I think every knitter has probably gone through that denial of knitting a garment, especially with lace, and knowing it’s going to be the wrong size, but just thinking “it’ll all work out when I block it”. Blocking does not solve everything – it looked lovely but didn’t fit. So a week ago I had to bite the bullet and frog the stockinette. All of it. In 4ply yarn. I’m a maths teacher, and I’m constantly saying to the kids that making mistakes is fine, you just need to learn from them. No need to get stressed, just go through it again and fix it. Maybe that has sunk in for me too, because to be honest, it was all pretty quick and painless to reknit. Being on holiday definitely helped, and we had a few bad weather days so I just curled up with a good book and my knitting and got through it. We did manage to get lots of really nice walks in too. We’ve got a rescue Jack Russell Terrier who is very high energy so it was a real treat for her to get lots of good long hikes. The area round Aviemore is absolutely stunning too. We mainly kept to the footpaths near Loch Morlich, but every path you go down is absolutely stunning. Here’s a few highlights from the many, many photos: And by the time we got back home, the cardigan was ready to block. Looking much better this time round! I'm writing the pattern up this week, so it should hopefully be tech edited and ready to purchase soon - I'll keep you posted!
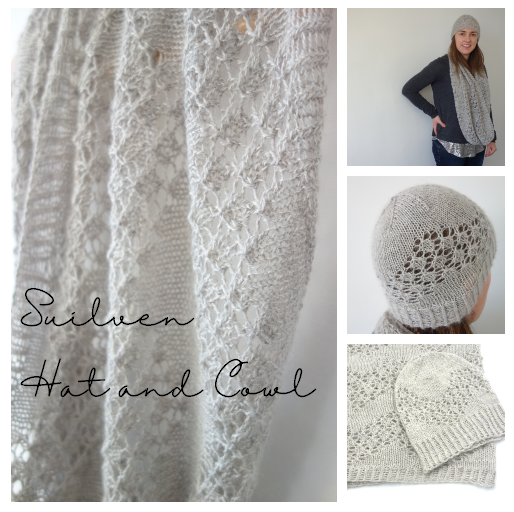
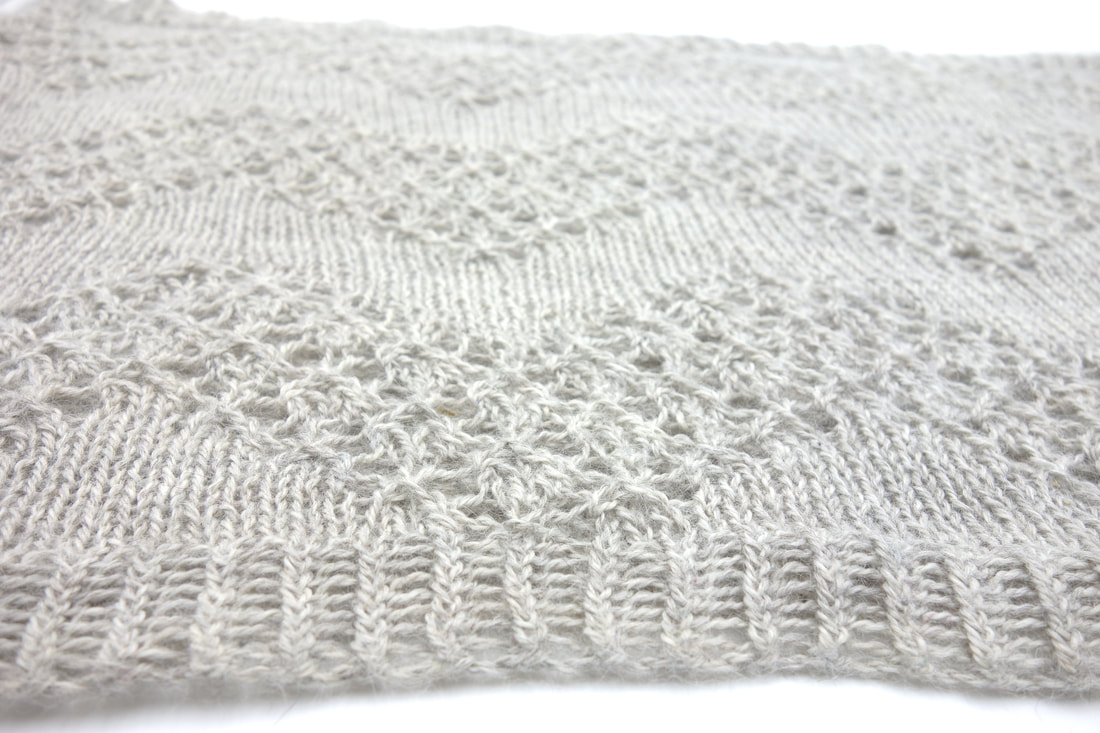
Our latest pattern release is now available! A pretty hat with zigzag stripes of delicate lace. Lightweight and warm in alpaca yarn, this is a real treat to wear. Suilven is an iconic mountain in the Scottish Highlands – the zigzags in the lace mirror its distinctive peaks. The lace pattern is easier than it looks, and working through the different rows in the zigzag pattern makes this an engaging and addictive knit. Here's the gritty details: For Suilven Cowl: Yarn: Juniper Moon Herriot Fine (4ply) Colourway Travertine (75% Alpaca 25% Nylon, 422 m/461 yds per 100 g) 1 (2) 100 g skeins = 422 m/461 yds (844 m/922 yds). Dimensions: 75cm/30” (120 cm/47”) around, 38 cm/15” deep for both sizes. and for the Suilven Hat: Yarn: Juniper Moon Herriot Fine (4ply) Colourway Travertine (75% Alpaca 25% Nylon, 422 m/461 yds per 100 g) One 100 g skeins = 422 m/461 yds, with plenty of yarn left over. Dimensions: Smaller size stretches to fit heads up to 54 cm/21.5” around. Larger size stretches to fit heads 55 cm/22” around and up. and for both: Needles: 4 mm/US 6 75 cm/30” circular needle Gauge: 16 sts and 28 rows = 10cm in stocking stitch after blocking. Extras: Tapestry needle for weaving in loose ends, one stitch marker. Patterns include both charts and written instructions for the lace pattern. You should be able to make a hat and smaller size of cowl from a single skein and you can make a larger cowl with a hat using two skeins. Suilven Cowl knitting pattern is available here.
|
Archives
July 2024
Categories
All
|


 RSS Feed