|
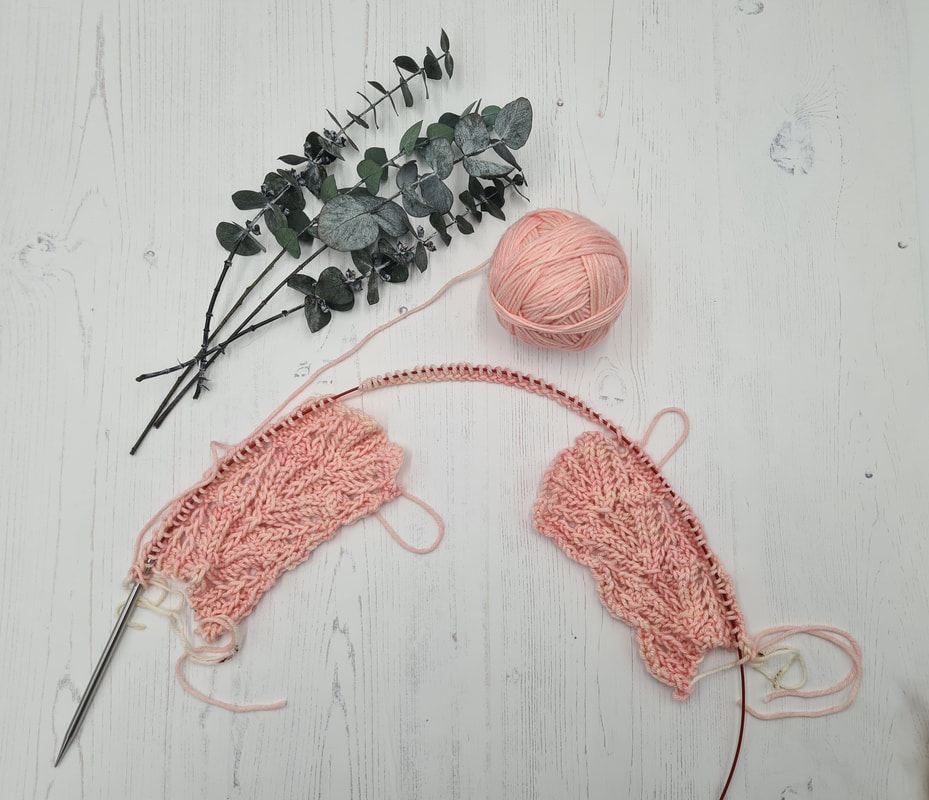
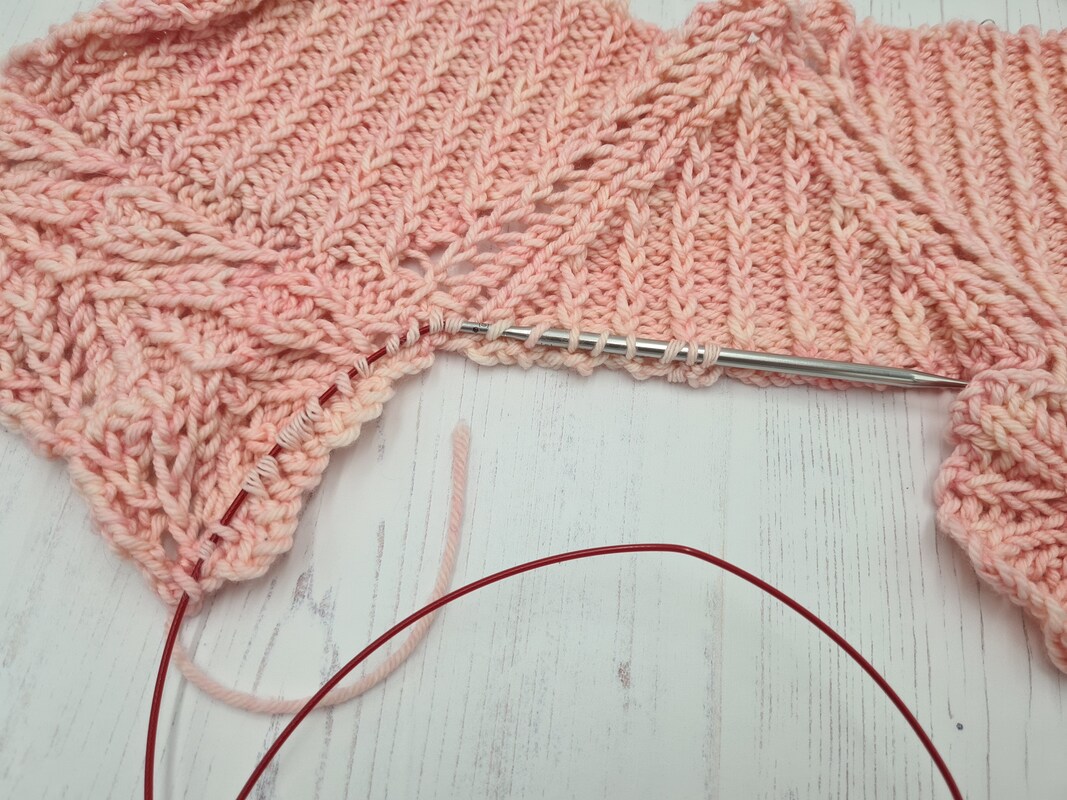
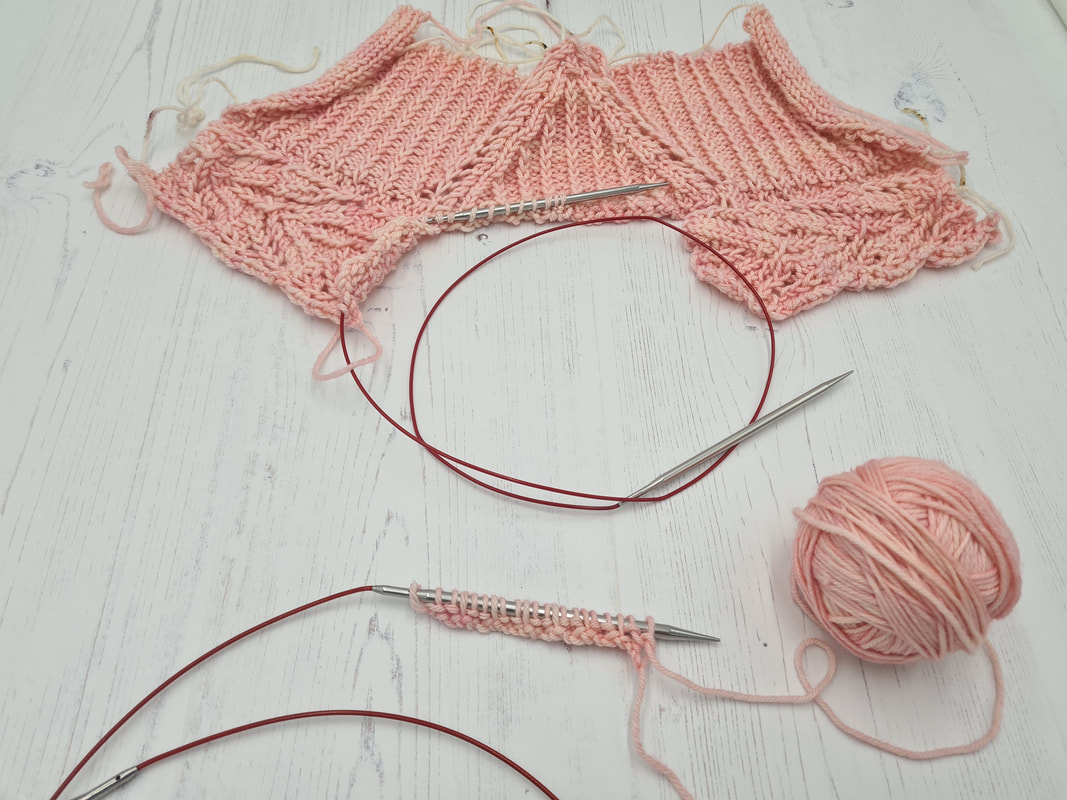
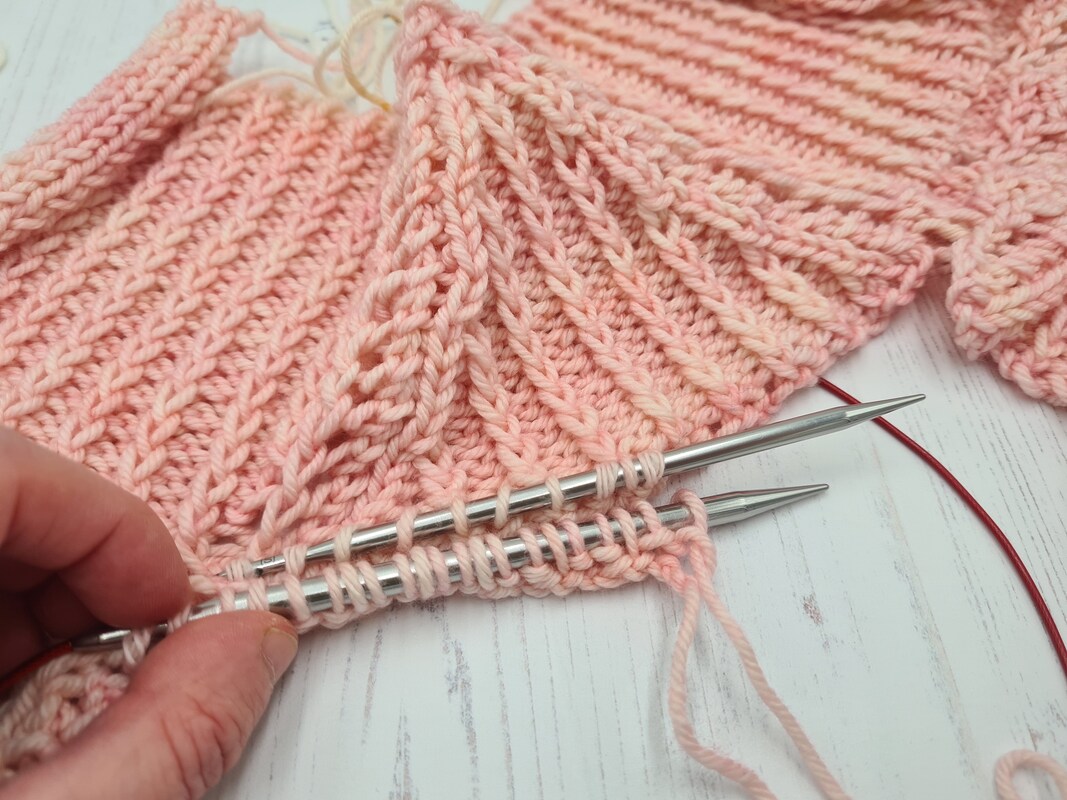
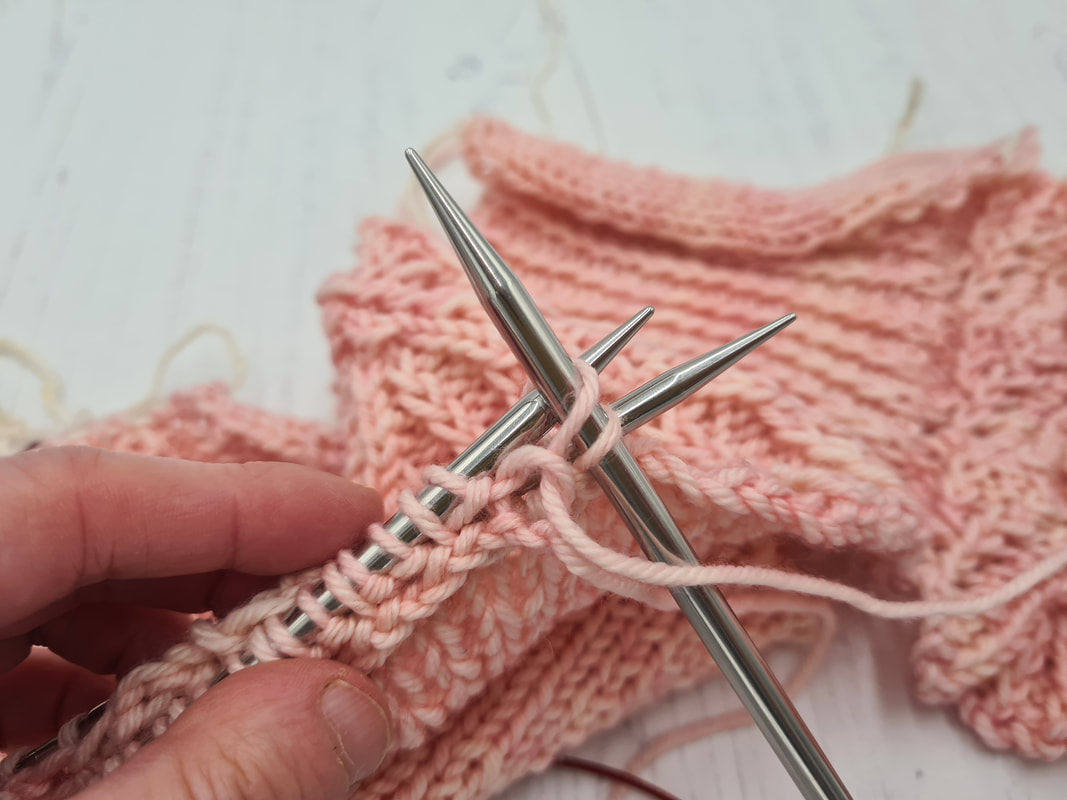
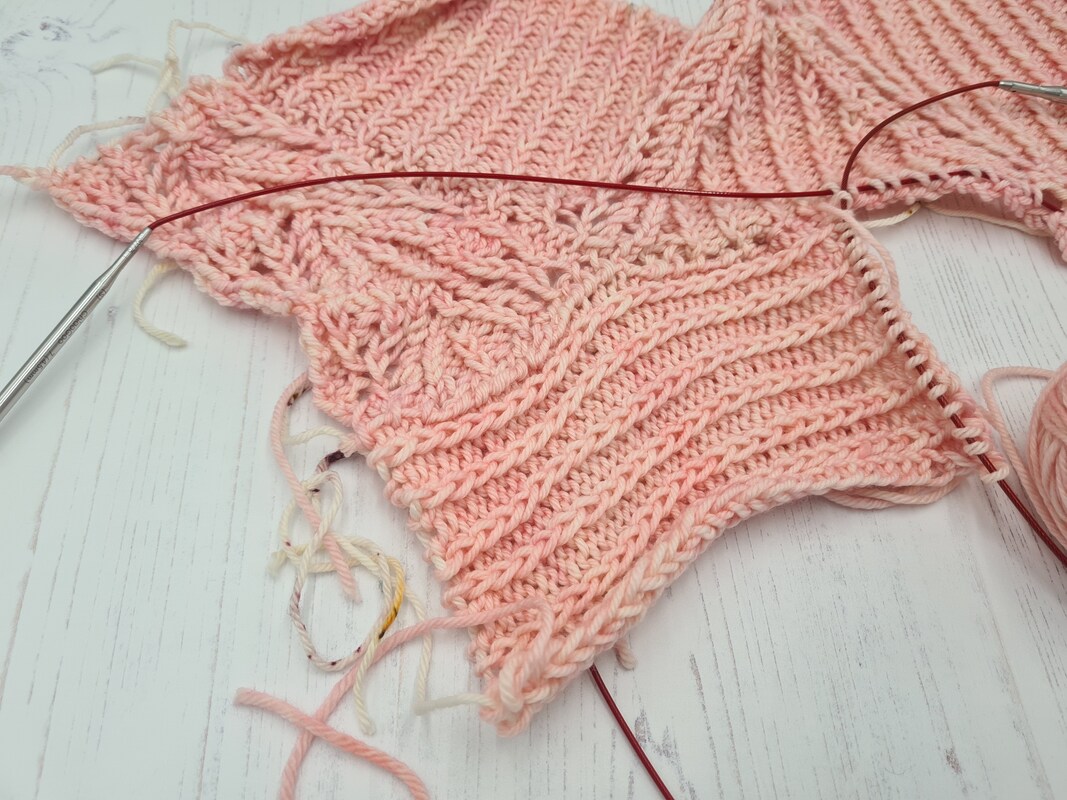
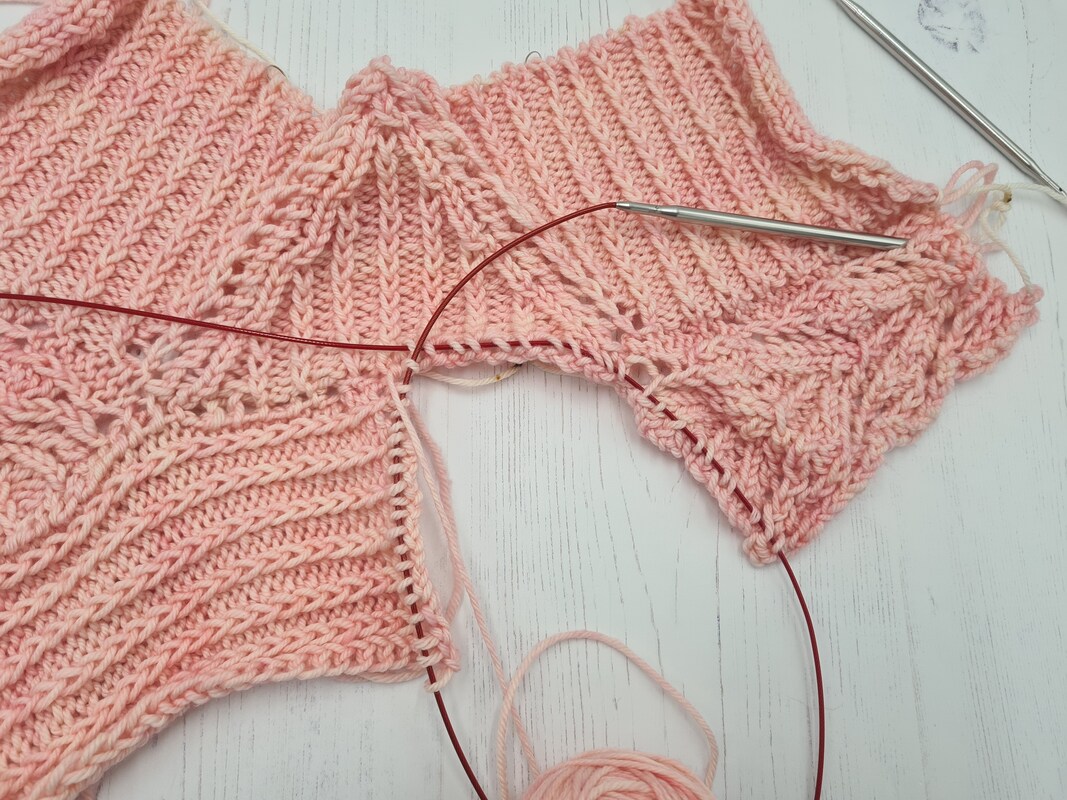
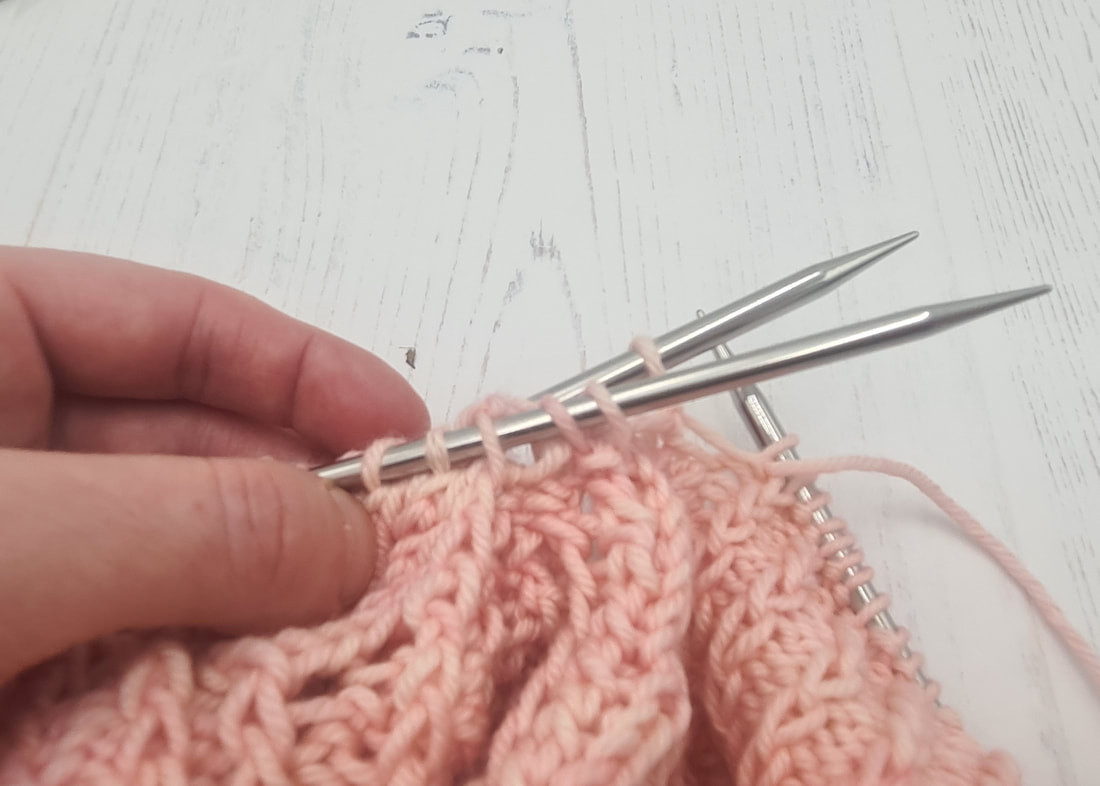
For my upcoming pattern, Goldenacre Cardigan, I really wanted the lace pattern to run all the way from the neckline down to the cuffs of the sleeves. To my mind, the best way to do this is using a Saddle Shoulder construction. In this post, I'll give details on how to knit a top down, saddle shoulder cardigan. 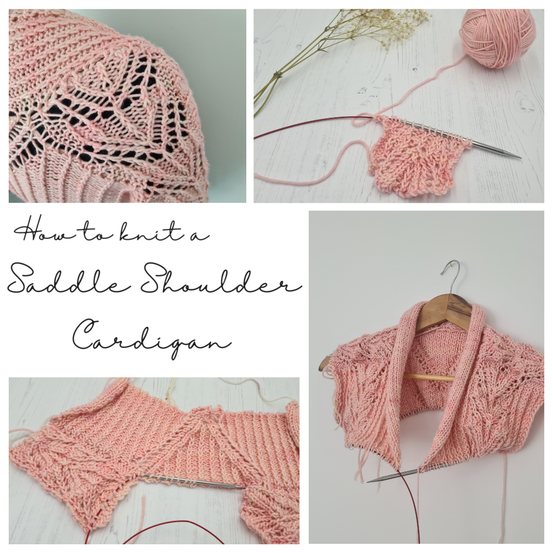 Here's a diagram showing how the upper body is put together, we go through each part step by step below. In my Goldenacre Cardigan pattern, obviously there are all the exact stitch counts and patterns, but here we just give an overview. 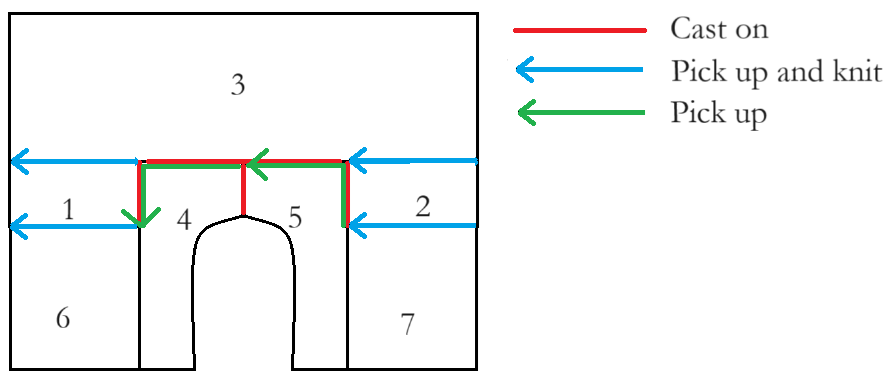 1 and 2: work strips of lace (or whatever pattern you're using!) for the left and right saddle shoulders. These will go along the shoulder from the neckline to the top of the sleeve. I made mine quite long for a drop shoulder. Left: working a saddle shoulder. Right: Pick up and knit stitches from saddle shoulders with a cast on for back neck in between. 3. Lay out the saddle shoulders as shown in the above right picture. The cast on edges are at the centre and the live stitches are at the outer edges. Pick up and knit stitches from right to left along the top edges as shown, and cast on stitches for back neck in between. Work these stitches down the back to the underarm (shown below) and place on waste yarn/spare circular needle/stitch holder. In Goldenacre Cardigan, we add short row shaping at the shoulders for an improved fit. 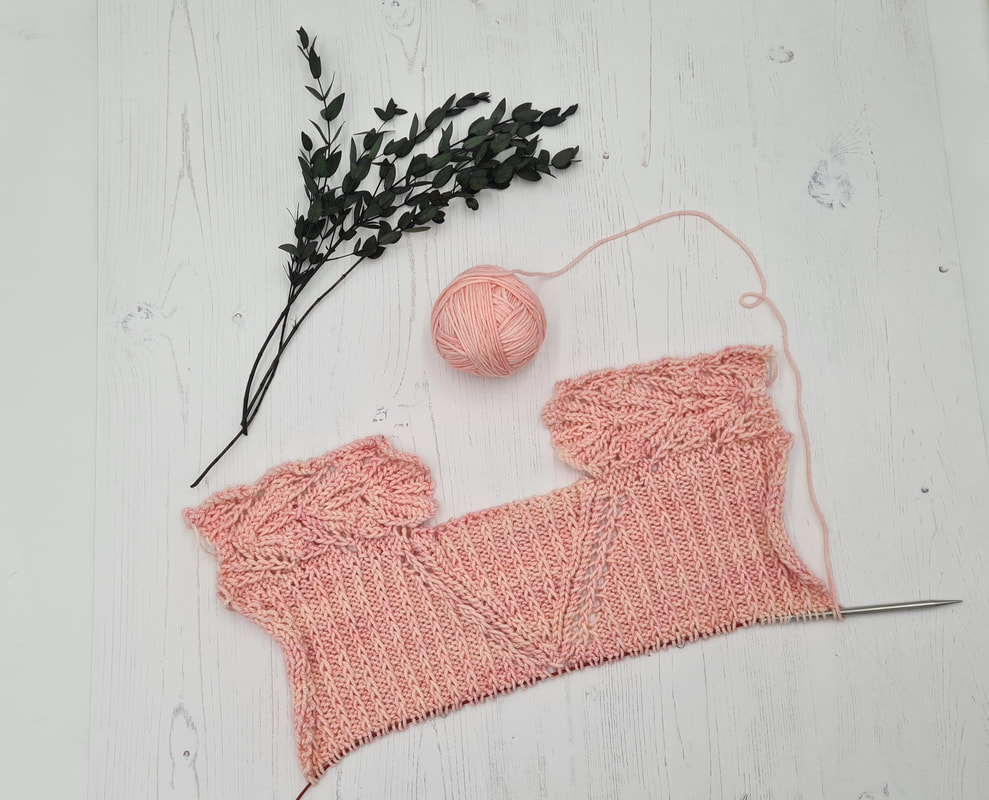 Upper back with saddle shoulders attached 4. In Goldenacre cardigan, there is an attached shawl collar. If you don't want a shawl collar attached, go ahead and skip to Step 6. Maybe you could pick up stitches round the whole front to keep things neat instead. Work the attached shawl collar from centre of back neck to the front edge of the saddle shoulders. We pick up stitches from the back and saddle shoulder with a spare needle (below top left). I picked them up from a row back to avoid a big gap. Then cast on stitches for the shawl collar (below top right), then work the shawl collar stitches, knitting edge stitches together with the picked up stitches on every second row (below bottom pictures). Top Left: pick up stitches from right saddle shoulder and right half of upper back. Top right: cast on stitches for shawl collar. Bottom left: hold shawl collar sts and pick up stitches together. Bottom right: purl shawl collar end stitch together with next picked up stitch. 5. Work the other half of the shawl collar. Pick up stitches from the saddle shoulder and along the back neck to meet the other half of the shawl collar (below left and centre). Rather than casting on, we pick up and knit stitches from the existing shawl collar cast on (below left). We then work the shawl collar stitches down towards to front edge of the saddle shoulder, again knitting edge stitches together with picked up stitches every second row (below right). Don't break the working yarn this time. Left: pick up and knit stitches from shawl collar cast on. Centre: Pick up stitches from left saddle shoulder and left half of back neck cast on. Right: purl shawl collar end stitch together with next picked up stitch. 6. Left Front: Work across shawl collar stitches, then pick up and knit stitches from the shawl collar for the left front. Stitches are worked down to underarm. 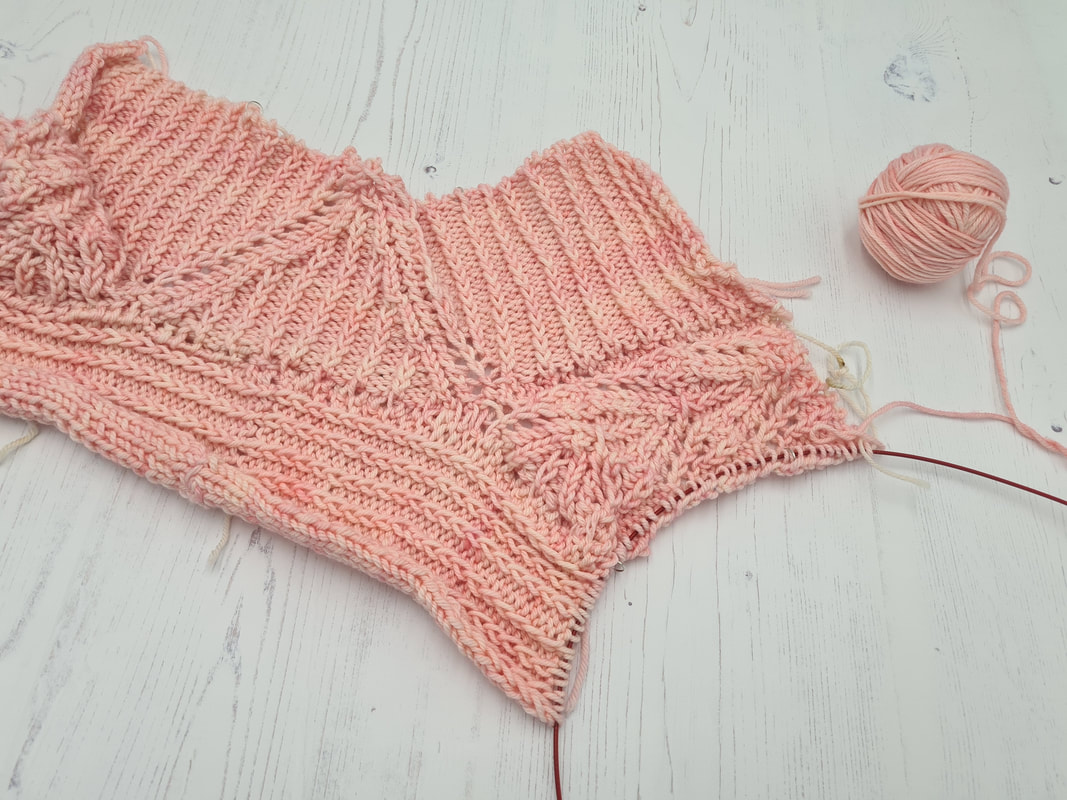 Work across shawl front stitches and pick up and knit stitches from saddle shoulder 7. Right Front. Pick up and knit stitches from right saddle shoulder the work live shawl front stitches. Work all stitches down to underarm to match left front. Finally, we join right front, back and left front stitches before working down to the hem.  Pick up and knit stitches from right saddle shoulder and work across shawl front stitches. And that's it! It ends up looking something like this: 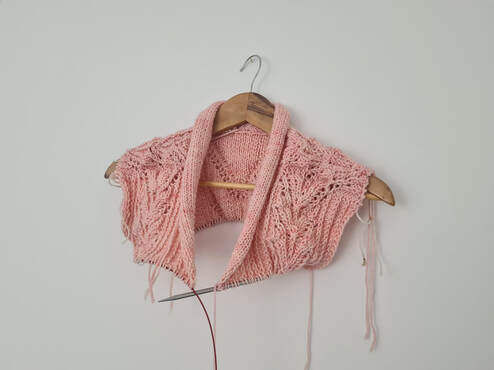 And here's a wee sneak peek at how the finished cardigan looks - it should be out for test knitting soon. Follow @littletheorem on instagram or twitter for the test call! 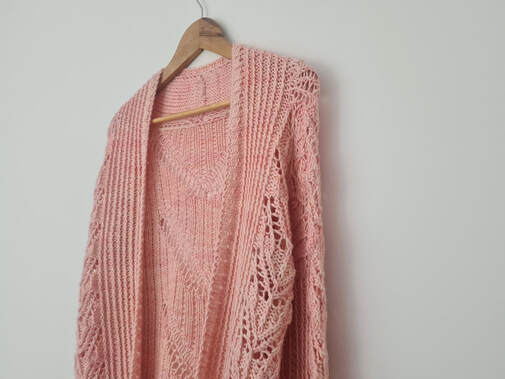
0 Comments
|
Archives
July 2024
Categories
All
|

 RSS Feed